How to Bring Back Potted Roses By this past year

Gardeners grow roses (Rosa spp.) In containers or pots for a lot of reasons. Generally hardy in U.S. Department of Agriculture plant hardiness zones 5 through 9, depending on species and variety, container-grown roses have the majority of the very same requirements as roses grown in-ground. Plants which have overwintered in containers might need a little more special attention when spring rolls around to get them up and growing well. Bringing these roses back successfully requires monitoring, pruning and appropriate watering and feeding.

Late Winter/Early Spring

At the late winter or early spring, then begin checking containerized roses for signs of life. During this time, depending on weather conditions, the rose must be preparing to break dormancy and sprout new development. Look carefully at the stems or canes and also you must see buds beginning to swell. These can eventually give rise to new development. If your area is prone to unanticipated hard frosts in early spring, then set the plants in a protected location away from harsh winds. This prevents buds or young development from freezing.

Get Growing

When all danger of frost has passed, then give the rose a good pruning. Using sharp bows, cut off all dead canes, weak increase and any branches that cross each other. The pruning aim with containerized roses is the same like those developed in-ground — an open vase or even chalice-like shape that promotes good air circulation. If you have a set of potted roses, then be sure that they are not too close together. Fungal diseases, such as black spot and powdery mildew, spread quickly in crowded conditions.

Food and Water

After the rose begins to break dormancy, begin regular watering. Container-grown plants, especially those raised in terra cotta pots, dry out quicker than the very same varieties grown in-ground. Water whenever the surface of the soil feels dry, continuing until water runs out the drainage holes. Roses in pots also need regular fertilization, because nutrients in potting mix become depleted over time. Utilize a water-soluble increased food, like 18-24-16, diluted at the rate of 1 tablespoon per gallon of water. Feed roses every 14 days, using the fertilizer-water mix taking the area of normal watering at those times.

Roots and Pots

If the rose does not recover quickly after winter, then it might be root-bound. To check, remove the plant from the grass If the sides of the soil are covered with a dense root network, then it likely requires a bigger pot. Select one that is at least several inches larger in height and width, place 1 inch of drainage material in the bottom and fill part-way with new potting mix. Position the rose’s root ball so that its top is a inch or two below the pot’s rim. Fill with additional potting mix, firming to get rid of air bubbles.

See related

How Can the significant Causes of Soil Erosion Be Corrected?

Soil erosion is the loss of topsoil or upper layer of dirt particles from land. It is a natural process caused by wind and rain, but human activities can greatly increase erosion. Over-cultivation or intensive farming, construction and deforestation worsen soil erosion. Erosion degrades dirt by destroying soil structure, causing loss of nutrients, and by decreasing the water-holding ability of soil. On slopes, Water Damage can cause mudslides. By using plants and other measures, homeowners can decrease soil erosion.

Planting and Mulching

Vegetation and soil containing organic matter help reduce erosion on both slopes and flat land. The origins of plants help hold the soil together. Add mulch or other organic matter into the soil to enrich it for better root growth and to make it more challenging for rain drops to split dirt particles. Vegetation and as many as 2 inches of mulch are successful at preventing excessive erosion on slopes with an increase around 33 percent, asserts the National Resource Conservation Service. Even though low-growing plants, such as ornamental grasses, can stabilize slopes with a 33 percent increase, steeper slopes require plants with deep roots, such as shrubs and trees, and other measures.

Terracing and Retaining Walls

You can avoid excessive erosion by decreasing the steepness and length of slopes. Build retaining walls or terraces into the incline. Terracing is like placing measures and several low retaining walls into a slope. Construct retaining walls and patio walls with bricks, rocks, concrete blocks or treated wood. Growing plants in the flat regions, created by terracing, also will help to reduce erosion. Consult your local building authority to find out if there are codes for construction keeping and patio walls. Utilize a professional for steep slopes or large terracing projects to ensure proper construction.

Water Diversion

Water runoff can cause erosion in nearby locations. To avoid water runoff from driveways and other paved areas, think about paving with material that enables water soak into the ground. Use porous pavers or asphalt to redo paths, driveways and other impermeable surfaces that cause runoff. Utilizing gravel is another choice. If rainwater from your roof triggers sediment in your lawn, use rain barrels to capture some of this rainwater. Another way to reduce water erosion would be to dig a small ditch near the top of a slope and allow the dump to drain into a planted area or a drainage area, created in a suitable area of the lawn.

Placing Windbreaks

Sandy soil is endangered over clay or silty soil by water and wind erosion. Erosion caused by water is the most severe in wet, hilly or sloping land areas, whilst erosion caused by wind is best in dry, windy and flat terrains. To reduce erosion caused by wind, plant shrubs or trees to function as windbreaks. Not all shrubs and trees grow well in windy places, so check with your regional garden nursery as to what shrubs and trees are best for a windbreak hedge.

See related

Can You Plant Tomatillos Next to Tomatoes at a Garden?

Even though the tomatillo plant (Physalis ixocarpa) and the tomato plant (Lycopersicon esculentum) might have similar names, they’re very distinct plants with different fruits. The tomatillo produces small yellow or green fruits enclosed in a papery covering known as a husk, while strawberries are husk-free and usually red, and larger than tomatillos. Both plants have been grown as annuals in all portions of the U.S. and you can successfully develop them side by side on your garden, as long as you listen to a few gaps in their cultural needs.

Picking a Site

You can begin both tomatoes and tomatillos from seeds indoors, beginning 8 or 6 weeks prior to placing seedlings in the garden, or you can purchase seedlings of plant at a garden center. Put them at the garden after land has warmed to at least 60 degrees Fahrenheit, picking a site that gets full sun for at least 6 to 8 hours every single day, a must for good fruit production. Avoid a place where soil tends to stay soggy after a rain, because tomato and tomatillo plants need well-drained soil to thrive. You may develop both tomatillos and tomatoes in pots on a warm patio or porch, but choose determinate types of tomatoes — these stop getting taller by mid-season– or miniature tomato cultivars, and maintain tomatoes and tomatillos in separate pots for best results.

Spacing and Water

Tomatoes and tomatillos need similar spacing between plants, about 2 to 3 feet, which gives every plant enough space to spread without crowding. An even and regular water supply facilitates greatest growth and fruit production, and neither plant tolerates drought well. Approximately 1 to 2 inches of water each week is ideal, including rain, so supply the plants with additional water during dry spells. Mulching tomatoes and tomatillos using 2 or 3 inches of straw or shredded bark also will help keep soil moisture, while suppressing growth of weeds that compete with water.

Soil Nutrients

Healthy seedlings do not require fertilization till they’ve started to blossom and put fruits, but you can improve your soil’s general fertility by adding several inches of compost into your soil at planting, mixing it in well with a garden fork. Both plants yield the most fruit when they’re fertilized during fruit production. For every single 100-foot row of strawberries, mix approximately 5 lbs of a 10-10-10 fertilizer into a shallow trench with the row when the first fruits are approximately one-third grown, provide another identical feeding two weeks after choosing the first fruit, and do so again 1 month later. For tomatillos, gently mix about 1/2 cup of a 5-10-10 fertilizer into the soil around each plant after choosing the first fruits to encourage continued flowering. Because tomatoes are heavier feeders compared to tomatillos, it’s best to plant them at side rows, so that it is possible to fertilize them individually.

Other Problems

Tomatoes are self-fertile, so you can select a great deal of fruit from a single plant, but the tomatillo plant does not share this attribute, therefore plant at least 2 tomatillos at a good harvest. Tomatillo plants typically become three or four feet tall, though some strawberries can be 5 or 6 feet tall, depending on the cultivar, and plants tend to sprawl on the ground since they grow if they’re not supported. Contact with the ground promotes spoiling and rotting of fruit, therefore both plants benefit from staking or growing in cages. The plants are also prone to the same insect insects — aphids, cucumber beetles and other leaf-eaters — that could damage leaf and lessen fruiting. Spray plants with insecticidal soap to control these insects, diluting 6 tablespoons in 1 gallon of water. Spray until the plants have been dripping wet and repeat every 2 weeks as required.

See related

What Is Literary to Switch by My Leach Lines?

Yellowing strips of grass above leach lines are a problem during summer weather. Discolored strips of grass in the yard are an issue. Less defined regions of grass that coincide with moist weather are a symptom of a flooded leach field. A flooded leach field can severely harm grass and might cause.

Striping the Yard

Brown or yellow stripes appearing during dry weather at the yard indicate the lay of leach lines. As temperatures increase, more moisture is drawn by grass . The soil above leach lines is more shallow than the soil in the remainder of the yard, so it holds less water compared to the remainder of the yard, causing grass directly to dry out and turn yellowish. Regular mowing or cutting the yard low adds additional stress. If grass turns yellow after it is mowed, mowing less frequently and raising the mower deck can stop the grass from turning yellowish.

About Striped Leach Lines

The building codes which were in effect if there was a house constructed regulate the leach lines have been buried, and consequently the grass over them’s ability to withstand weather. Homes or older systems constructed in areas with a high water table or soil might have leach lines closer to the surface compared to building codes allow. Rebuilding the leach field to bury leach lines is an alternative, but generally dried grass’ stripes are dormant, not dead. They’ll recover when cooler autumn weather begins. The issue can be temporarily alleviated by watering the yellowish stripes at the yard, but it is generally not a fantastic idea. Watering the lawn over the leach field reduces its ability and may eventually create your septic system to fail.

Flooded Leach Fields

Leach lines present water to the soil, affecting the health of the grass over them. Regions of grass around the leach field are a indication that water from the leach field is flooding the grass over its root zone. Flooding in fields usually happens with restricted drainage during periods of moist weather in areas. Leach areas that are flooded are a problem that is serious; flood can kill parts of the yard that remain flooded for over a few days.

Hazardous Compounds

The compounds that enter the system attached to a field can have an effect on the yard around the leach field. The waste water discharged by lines can increase the amount of salt from the soil, causing the grass around the lines to turn yellowish. Chemicals dumped down the drain can impair the performance of the system and infiltrate the soil around the leach field, polluting the groundwater and damaging the yard.

See related

How to Boost Yin Yang Beans

Yin yang beans get their title from their white and black coloring, which looks like the symbol for yang and yin. Also known as calypso or even orca beans, they are an backyard crop that can grow in almost any of the diverse microclimates of the Bay Area. For example, gardeners in warmer areas of San Francisco County can plant yin yang beans most of the year; at cooler Santa Clara County, planting season runs from April. These bush bean plants grow up to two feet high and prefer well-drained soil with complete sun exposure.

Until the soil in a sunny area and work a 2-inch layer of mulch to the soil to increase drainage and provide nutrients. Test the soil and, if needed, add sphagnum peat or ammonium sulfate to lower the pH level, or limestone to raise the pH level to 5.5 to 6.5. Add 1 cup of low-nitrogen fertilizer, such as 5-10-10, per 10 row feet. Keep away from high-nitrogen fertilizer, which results in heavy foliage with minimal or no bean production.

Plant yin beans in rows 2 feet apart when the soil temperature is between 60 and 85 degrees Fahrenheit. Plant 2 to 4 inches apart and the beans 1 inch deep. The bean plants should emerge in eight to 16 days and will grow within 75 days.

Water the yin yang beans lightly and keep the soil moist. To prevent fungus stains that are rust-colored, do not enable the leaves to become wet. You can supply around 1/4 inch of water a day to prevent the soil. Insert a layer of mulch to conserve moisture and protect the shallow root system of the plant.

Pull up weeds as they emerge round the bean plants. Be careful to not damage young bean plants.

Allow yin yang beans to dry on the plant, and harvest the beans when most of the leaves have turned yellow. Do not water the bean plants whereas the beans are still drying. Dig the plant up if the weather is moist and transfer it to a location that is sheltered. In dry, sunny weather, the beans should be dried within three to four weeks.

See related

Landscape Design: A Secret Garden

All of us could use a distinctive place in a backyard where we can unwind, read a novel, like a cup of java or listen to the birds. It can be a escape we discuss with others or use for personal contemplation. No matter the size, place or purpose, the key feature stays the same — it needs to be partially hidden from the external world: a garden.

Among my design mantras is that a garden ought to be experienced, not just detected, and integrating a secluded nook is one approach to attain this. Create a sense of anticipation by winding paths around billowing shrubs to obscure the last destination. Or split a winding path in this manner that people unexpectedly discover a clearing in the forest where a weathered wooden bench or 2 invites them to linger. Smaller gardens can still have this sense of surprise; just tuck a simple chair below a statuesque tree or maybe behind wispy ferns and tall grasses.

Here are a few ideas to get you started. Many of these projects are possible to complete in a weekend or not.

Thuilot Associates

1. The Hidden Clearing

there’s something exciting about abruptly coming across an open space in an otherwise densely planted backyard. It is possible to attain this effect no matter how big or small your garden is. Even clearing just a little spot behind a stand of tall grasses can make that sense of intrigue.

While larger spaces can serve as gathering places for toasting marshmallows over a fire, smaller nooks can be a place for sitting and viewing dragonflies dance.

Le jardinet

The clearing has to be discovered, instead of fully visible. Use layers of trees, shrubs, perennials and grasses to wrap your secret garden with living walls.

This hidden oasis might be a destination point at the end of a path or a midpoint to be appreciated as part of a longer garden journey.

Oehme, van Sweden Landscape Architecture

The clearing can be a large entertaining space or a secluded spot for 2. Think about the planned function before you tackle any significant construction. Main entertaining areas are best sited near the kitchen, whereas the secret garden is likely to be tucked further away.

Le jardinet

Eliminate a few plants from the interior portion of a heavily planted edge and add a layer of bark mulch or gravel to make an instant nook.

Use repurposed objects to create your own seating. Here the designer put an off cut of ornamental acrylic over sections of pipe. Logs would be another ideal seating choice for a setting.

NatureWorks Landscape Services, Inc..

2. The Secluded Nook

Not all backyard seating areas need to be formal decks, patios or balconies. A secret garden can be nestled into the edge of a border right one of the plants, providing you a front-row seat for viewing butterflies and smelling the roses. Add a lot of plants behind and to each side to make a leafy enclosure. Fragrant plants in such an intimate space could be a beautiful bonus.

FermobUSA

Limb up an existing tree (prune the branches) to make a little space beneath its dappled canopy. The tree can be alongside a path or within a backyard border.

Search garage sales and thrift stores for enchanting chairs which can be spruced up with paint.

Le jardinet

3. The Arbor Refuge

An arbor might seem to be an unlikely option for a secret garden, however you can allow it to be even more secluded by shrouding the structure with appealing vines and from planting shrubs and grasses into the side.

Camouflage furniture by selecting finishes and colors that blend in with the surroundings, such as timber tones and soft greens.

MCM Design

Hang a hammock or swing chair from an existing overhead construction. Raised decks frequently have an area underneath that goes rancid.

Island Gardens Company

4. The Hillside Retreat

Substantial changes in altitude are frequently considered a design challenge in gardens, nevertheless they can be used to advantage when you’re designing a secret escape. Tuck a bench against the face of the hillside so it’s going to be seen only when someone is exploring the winding path. The hillside and plantings will conceal the bench when it is seen from above.

Put the bench so that it hugs the hillside safely while allowing sufficient room to pass by easily. A view of a decrease garden or an open vista increases the adventure of discovery.

Dig Your Garden Landscape Design

Save the price of furniture by just adding vibrant weatherproof cushions to the top of a retaining wall.

More: Unwind in Your Own Private Garden Escape

See related

5 Sensational Flowering Vines for Warm Climates

Love them or hate them, no tropical garden is complete without those wild and crazy vines. They move on where they do not belong, require persistent pruning, consume more space than they are ever awarded and will swallow a drop in a week if given the opportunity, but we grow them for one very good reason — the flowers, obviously. Here are a few of the showiest flowering vines you will see from late summer through autumn.

Cape Honeysuckle
(Tecoma capensis)

You will love this sprawling and rambling vine (more of a shrub, really) because of its profusion of vibrant orange flowers and its fine evergreen foliage. As you can tell from the bee at the photo, pollinators love it hummingbirds especially. The flowers that cover the plant in the summer and autumn include a gold orange to a deep and dramatic red-orange, so buy a plant when it is in bloom so you receive the type that works for your landscape.

Cape honeysuckle produces a big and untidy bulk of prolifically blooming stems, but it may be trained to develop trellises if you help it along by tying the rambling stems loosely to their support. Use it as a ground cover big hillsides or to restrain erosion, but be ready to give it plenty of room. It will spread.

Gardeners in colder climates will also be in luck. As long as you are willing to give it an occasional trim, cape honeysuckle works nicely in the container garden and may be kept upright with the help of stakes or permitted to scramble over the pot’s edge.

Where it will grow: Hardy to 20 degrees Fahrenheit (USDA zones 9 to 11; find your zone)
Water requirement: Low once established
moderate requirement: Total sun
Mature size: 6 to 2 feet
Seasonal interest: the largest flush of blooms is from late summer to fall.
When to plant: Spring through autumn

Passionflower
(Passiflora spp)

They come in all sorts of colours, ranging from the intense scarlet blooms of crimson passionflower (Passiflora miniata) into the pastel lemon passionflower (Passiflora citrinus) and white passionflower (Passiflora ‘Constance Elliott’). Not that passionflowers really need much else to warrant their use, but edible types — like the passion fruit (Passiflora edulis) and giant granadilla (Passiflora quadrangularis) — are delicious eaten out of hand, added to ice cream or juiced.

Passionflowers are invaluable host plants for butterflies, particularly the ones that are native to your region. Maypop is native to much of the eastern United States and has the bonus of producing edible fruits, and corky stem passionflower (Passiflora suberosa) is a fantastic selection for most of Florida. Another one to look for is incense passionflower (Passiflora ‘Incense’), that comes packed with a surprisingly strong odor.

They do not need much in the means of care, but passionflowers are ordinarily quite vigorous (some might use the word “weedy”) and might need to be heavily pruned or pulled up from time to time. In other words, if the butterfly caterpillars do not get to them first.

Red passionflower (Passiflora miniata) is among the more dramatic species offered and will occasionally bear fruit.

Where it will grow: Varies by species. Some are hardy to -10 degrees Fahrenheit (zones 6 to 11).
Water requirement: Typical
moderate requirement: Partial to full sun
Mature size: Varies, but maximum reach 6 to 8 feet
Seasonal interest: Summer through fall
When to plant: Spring through autumn

Gloriosa Lily
Gloriosa superba ‘Rothschildsiana’

This vining lily lookalike has flowers that are every bit as exotic looking as people of the passionflower, but with a twist. To start with of the flowers have twisted petals, and the blooms face down, looking much like comets or flickering flames as they switch from a light yellow to full-blown orange and crimson.

Plant the long and fleshy roots just as you’d bulbs, 2-3 inches beneath the soil surface from spring through the summer. Tropical gardeners and impatient gardeners in colder climates may add container-grown plants into the garden whenever freezes are not a problem.

Plant gloriosa lilies near a support such as a wire trellis or an informal shrub, so the distinctive tendril-like leaf ideas may grab a foothold. Resist the urge to prune errant stems, as doing this will kill back the whole stem into the ground and delay blooming.

Where it will grow: Hardy to 20 degrees Fahrenheit (zones 9 to 11)
Water requirement: Typical
moderate requirement: Partial to full sun
Mature size: Rambling blossom 4 to 6 feet long
Seasonal interest: Summer through fall
When to plant: Spring though summertime

Caution: All pieces of gloriosa lily are toxic if ingested, and handling the roots can be irritating to some, so plant it out of the reach of children and manage the roots using gloves as a precaution.

Pink Trumpet Vine
(Podranea ricasoliana)

Its cotton-candy-pink and trumpet-shaped blooms resemble those of the associated crossvine and trumpet creeper (that are also good choices too), but that South African native speaks in softer tones and ha finer foliage, which makes it ideal where a bit of subtlety is necessary. Oh, and did I mention it smells amazing?

Plant this one in the base of your tallest trellis, fence or pergola, since it has the potential to grow 20 feet tall when given the space. It’s also drought tolerant once established and requires little care if it is given enough room to roam freely. It might be suitable for containers, as long as you have pruning shears in the ready to keep it at scale.

Noelle Johnson Landscape Consulting

This pink trumpet vine is twining along a weapon.

Where it will grow: Hardy to 20 degrees Fahrenheit (zones 9 to 11)
Water requirement: Low
moderate requirement: Total sun; will require some color
Mature size: 15 to 20 feet
Seasonal interest: Flowers summer through autumn
When to plant: Spring through autumn where hardy

Bougainvillea
(Bougainvillea glabra)

Out of each of the vines in this ideabook, bougainvillea is the most frequent; it may be found in gardens everywhere from the shore of Florida to California, where it climbs scalp and stucco mansions. It naturally lends itself to Mediterranean design, with its muscular and winding woody trunks and rosy warm-hued blooms, or maybe it’s just because of its exceptional drought tolerance?

What most people consider that the flowers are actually papery and vibrant adapted leaf-like structures known as bracts that surround the real flowers, which are usually insignificant and white. The second most obvious characteristic is a bit more unpleasant, as the whole plant is generally armed with narrow and piercing thorns — certain to make any burglar’s day a memorable experience if it is planted along a wall.

Bougainvillea may be pruned back hard in spring, or you could remove the lower branches to reveal the twisting and fissured trunk for a piece of living sculpture. Just make certain to look but not touch.

Where it will grow: Hardy to 20 degrees Fahrenheit (zones 9 to 11)
Water requirement: Low
moderate requirement: Total sun
Mature size: Up to 40 feet
Seasonal interest: Summer through fall
When to plant: Spring through autumn

See related

Great Garden Combo: 3 Awesome Plants for a Deer-Resistant Screen

Many challenges are faced by gardeners. The need to screen neighboring houses is a common one in urban lots and is typically dealt with a 6-foot-tall weapon or a combination of arborvitae or comparable columnar trees. However, this situation can be a chance to turn into a problem area to a garden highlight. Rather then construct a barricade, include layers of deciduous and evergreen trees and shrubs, then accent them with seasonal color for a gorgeous focal point you may want to look at.

In rural gardens deer could cause substantial harm and try the patience of even the very wildlife-loving gardener. The first strategy is to select plants that are generally considered algae resistant. I also have found that this sort of obstruction planting are able to continue to keep the deer off from some plants which may otherwise be considered caviar. Dense layers appear to require too much effort for the deer to permeate, and they wander elsewhere to hunt for their treats.

The most gorgeous planting combination below will flourish in full sun, average soil and a temperate climate, and consists of deer-resistant plantings. Considering that the hardiness zones are given for each plant, start looking for comparable substitutes if one of these drops out of your range. Just follow these principles to make beauty regardless of the beast.

Le jardinet

The top screens are the ones which don’t appear to be screens at all; this is a perfect example. Layers of deciduous, evergreen and seasonal color make this an eye-catching combination if it’s used to make some privacy, keep deer or simply capture interest as a striking vignette.

This calming monochromatic scheme relies on varying foliage textures and forms for interest. A canopy of golden locust tree (Robinia pseudoacacia ‘Frisia’) leaves rustles in the breeze, towering over dwarf Japanese cedar (Cryptomeria japonica ‘Elegans Nana’), while a strong vertical accent provided by fragrant lilies(Lillium ‘African Queen’) fills in the middle plane.

Le jardinet

How to Get the Look

1. Start with the showstopper.

Golden locust tree (Robinia pseudoacacia ‘Frisia’)is once seen, never forgotten; this really is a shrub that will always be on your favorites list.You have only to endure under the golden canopy of foliage that is translucent to feel bathed in sunshine even on a cloudy day.

This fast paced shrub tree is shunned by deer, as a result of the thorns across the branches. It has fragrant white flowers in spring, although they’re slightly hidden by the foliage, and it is remarkably tolerant of poor soils. Maybe its main drawback is that the branches are brittle and can break in strong winds, therefore placing it into a somewhat secure area is recommended.

USDA zones: 4 to 9 (find your zone)
Water condition: Low once recognized
moderate requirement: Full sun for best color
Mature dimension: 30 to 50 feet tall and around 20 feet broad
When to plant: Plant it into well-drained dirt in spring or fall.

Le jardinet

2. Add a lower tier.

Dwarf Japanese cedar (Cryptomeria japonica ‘Elegans Nana’) always reminds me of a fat small dumpling. It has a rather loose mounding shape and a soft, feathery texture.

I adore evergreens that alter somehow during the entire year; this one does this nicely, with blue-green summer foliage that takes about a purple throw during winter. Being evergreen, this conifer offers year-round interest.

USDA zones: 5 to 8
Water necessity: Moderate
moderate requirement: Full sun or partial shade (therefore it’s Perfect for planting under a deciduous tree)
Mature dimension: 7 feet tall and around 7 feet broad
When to plant: Spring or fall

Le jardinet

3. Fill in with accents that are interesting.

African Queen lily
(Lillium ‘African Queen’) is your filler here; Oriental lilies are a fragrant garden highlight in mid to late summer. With each bulb supplying multiple blooms over several weeks, you receive a lot of punch to the buck.

‘African Queen’ is one of the tallest cultivars, and its melon-colored trumpet-shaped flowers are really stunning. Grow these massed on your edge for best effect — they will continue to multiply each year.

USDA zones: 3 to 9
Water necessity: Average, but avoid soils that stay moist during winter
moderate requirement: Total sun
Mature dimension: 5 to 6 feet tall
When to plant: Plant bulbs in spring, about 6 inches deep and with the pointed side up.

Le jardinet

4. If you prefer, expand the combination. Add color contrast and an extra layer by adding darker foliage for example ‘Grace’ smoke bush, shown here. This can help to fill in between the golden locust shrub and conifer whereas the lily grows and continue to include construction when those blooms have ended.

I have found that deer may nibble smoke bushes somewhat but seldom do significant harm. In this compact planting like this, I would not expect a problem.

Banyon Tree Design Studio

Botanical name: Cotinus x ‘Grace’
Common name: ‘Grace’ smoke bush
USDA zones: 4 to 9
Water necessity: Average
Light requirement: Total sun
Mature dimensions: 10 to 15 tall and broad, but I love to cut it back hard in spring. This prevents flowering, produces larger leaves and keeps it about 8 feet wide and tall.
When to plant: Plant it into well-drained dirt in spring or fall.

Le jardinet

By continuing to include layers of lush and colorful foliage, you can develop the combination to attain the desired degree of screening.

Deer disclaimer: The phrase “Deer will eat anything if hungry enough” is often quoted. Personally, I would rather say “Deer will eat anything if expensive enough.” In any event, the suggestions here are based on my deer battles and those of many references that are highly dependable. Fantastic luck!

More: Things to do in your garden now

See related

Northeast Gardener's December Checklist

It’s a year’s last month. Most of us have stashed away gloves and tools for the season, and a few can kick off their boots with a toasty fire to warm their tired limbs. While our gardens sleeping beneath a blanket of mulch and snow and do not require attention, there are still plenty of things to think about and do.

For starters, look at the landscape, discovering its basic outlines and contours. Tall or short deciduous trees, shrubs and evergreens comprise vertical walls, critical focal points in the winter garden. With off the leaves deciduous woody plants, the structure becomes more evident, and masses of shrubs or parasite trees accept new character — particularly if they’ve got interesting bark, like the multistemmed redtwig or even yellow dogwood (Cornus spp), or even the Japanese coral bark maple (Acer palmatum ‘Sango-kaku’, zones 5 to 8), an outstanding cultivar with odd coloration.

With everything looking gloomy and empty, evergreens become the dominant landscape feature, therefore take inventory — do you have a good mixture of evergreens on your beds and borders?

Paintbox Garden

Enjoy winter evergreens. Vertical evergreens, like the columnar white cedar ‘Emerald’ (Thuja occidentalis ‘Emerald’, zones 3 to 7), are great for mixed borders, as they punctuate space and take up little room. Planted in classes, they draw on the eye and offer a good backdrop to grasses and stonecrops.

Keep in mind that deer love to eat cedar and can easily defoliate plants. If you are in deer country, loosely wrap burlap as high as possible around the tree to protect it. It’s awful, yes — but it is far better than having to change out your cedars, that can be costly.

Paintbox Garden

Nothing beats on boxwood for classic good looks in containers in this time of year, especially by doors, where it can be dressed up with miniature white lights or left au naturel. For best result, mix things up with different-size containers and plants, and be sure they are watered on a regular basis throughout the season. If you are utilizing ceramic pots, it is ideal to keep them on a covered porch therefore freeze-thaw cycles do not harm the containers.

Boxwood (Buxus spp) is also lovely in the winter when planted in groups of varying sizes with all the creeping ground cover bearberry (Arctostaphylos uva-ursi, zones 2 to 6), that Native Americans telephone kinnikinnick. It’s a dependable evergreen that enjoys acidic soils and full sun.

Paintbox Garden

Bearberry is a good choice for cold-climate areas where winters are harsh, and it seems particularly good planted around the base of white birch (Betula spp).

Its reddish stems contrast brightly with its shiny, rounded leaves, which turn bronze in dormancy. Good cultivars of this underused perennial comprise ‘Massachusetts’ and ‘Emerald Carpet’.

Cut little packages and tie them together with ribbon or twine to decorate preferences, or add them into fresh arrangements for the holiday table.

Paintbox Garden

Take inventory of outside seating. Most terrace furniture gets winterized beneath protective covers or moved into the garage, however the Adirondack-style chair shown this is made of tough postconsumer plastic from recycled milk jugs and will stand up to winter’s worst weather. Since the substance is a composite, the color won’t fade and the seat resists cracking and splitting, unlike its own wooden counterparts.

Furniture that stays in position is a great option, and on gentle days it is good to have the ability to sit outside and soak up the sun. Doesn’t that sound better than dragging a lawn chair from a storage shed?

Paintbox Garden

Keep an eye out for wildlife. This birdhouse makes a great focal point from my kitchen window, and it is practical too. As juncos, cardinals and grosbeaks forage for crabapples and winterberries on my house, they often perch on its roofing or land on the split-rail fence nearby.

Feeders suspended from branches or wrought iron poles set in strategic places can offer many hours of viewing pleasure. Make sure to install your feeder sticks before the ground freezes solid.

It’s true that birds are the blossoms of the winter, bringing color and joy!

Paintbox Garden

Walk around your premises and check trees for fallen limbs or broken branches. Winter storms can wreak havoc and cause widespread harm; get outside with a broom following moist, heavy snow and brush it off shrubs and tiny trees to prevent permanent damage.

Collect branches and add them into a brush pile on your property — somewhere from view, where they can decompose and make a shelter for wildlife.

Light pruning may be done at any time today that plants are dormant. Look for healthier bud tips and snip off dead branches to increase the brush or burn pile.

Paintbox Garden

Note areas that may require stonework. Start getting names of reliable masons or landscape contractors who service your community.

If you are a new home owner, notice slopes and grade changes that may require retaining walls and be prepared to devote some hard-earned cash on hardscaping next calendar year. Be sure to check references and be sure that your contractor is fully insured.

Smaller jobs, like walkways, patios and chair walls, are good to think about in the landscape design process; the stripped-to-the-bones view of your premises at this time of year can make you see where privacy is needed or where to route a stepping stone path through a side yard.

Paintbox Garden

Get outside with a camera and take photos of your backyard. Back indoors, you can brew a pot of tea and examine the images while you thaw.

Keeping photos organized in easy-to-access folders on your computer will help immensely as you plan your next movement. You are able to organize plants by particular areas of the backyard, such as “Front Walk” or “Peony Bed,” or set them by groups, such as foliage or blossoms. It’s good to have a visual record of your own landscape, particularly as you chronicle the growth and development of new areas. I am amazed at the transformation of a lengthy border I installed a few years ago — I’d forgotten how small everything was!

See the way to arrange photos in a flash

See related

California Gardener's November Checklist

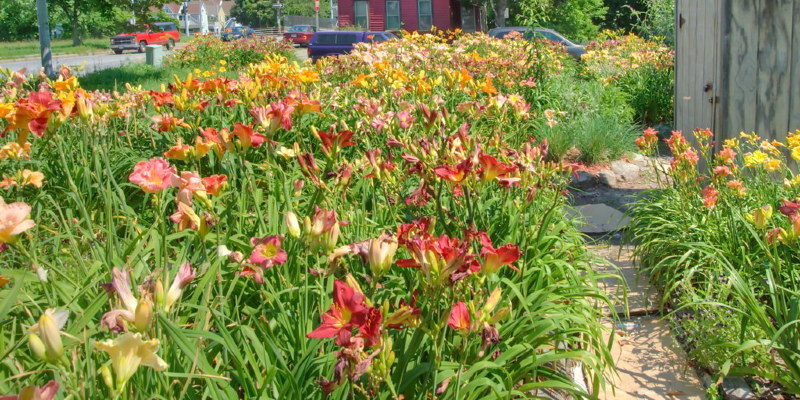
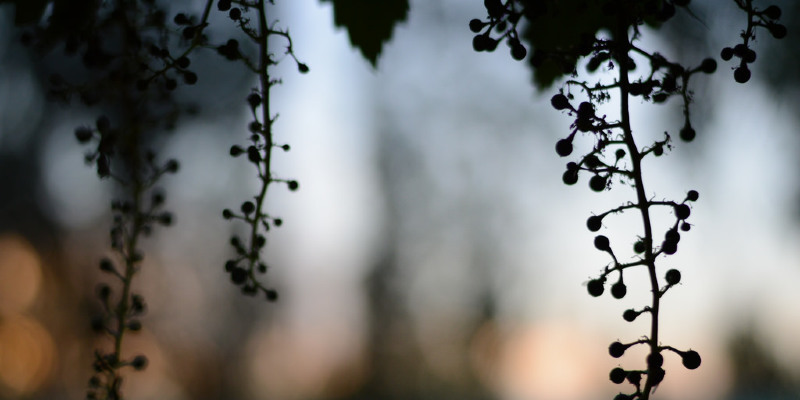
Other than the smell of a turkey roasting in the oven or the sight of a quarterback tossing a football to a receiver at the flat, nothing makes me feel much better about November compared to a persimmon tree completely loaded with glistening orange fruit among foliage turning a matching color.

That is a plant that says a lot about gardening in California, and maybe about California in general. Native to Asia, it’s made itself home from the state. It’s simple to grow. It is quirky — that the fruit of the most typical species is so sterile that you can not eat it until frost or time softens it.

Naturally, this persimmon is also a reminder of distinctive California’s plants and gardening climate are — and also the number of awesome things we can do in the garden this month when much of the nation is moving indoors for an annual hibernation.

If you don’t have space for a persimmon tree, then just purchase some of the veggies and maintain them on the counter for a couple weeks. Or at least browse this homage to the persimmon from Gary Snyder, California’s most haunted modern nature poet.

Glenna Partridge Garden Design

Grow bulbs. Like nearly everything else that has to do with growing bulbs in California, placing them in containers calls for a few twists. You need to compensate for the lack of winter chill required by the majority of bulbs and to the shallower planting thickness in a kettle. Here are a few methods for planting the most popular bulbs — tulips and daffodils — in containers.

Choose terra-cotta or plastic pots that are at least 8 inches in diameter — just as large as 14 inches for larger daffodils.
For an 8-inch kettle, use five or six bulbs. To get a 14-inch pot, use as many as 15 to 20.
Add 3 inches of good soil mix, industrial or your own, preferably including fertilizer, towards the bottom of the pot. Place bulbs on top; the flat sides of tulip bulbs must all point in precisely the exact same direction. For the greatest splash, pack bulbs closely together.
Cover bulbs with sufficient dirt to reach to 2 inches under the pot’s rim. Water thoroughly, then set the pots in a cool, frost-free spot outdoors.
Pile a minimum of two inches of compost on top for security. Keep the soil moist.
When foliage begins to poke through the dirt in late winter or spring (gently scrape back the mulch occasionally to test), remove the mulch carefully along with the transfer pots to a sunny spot.
Water often enough to keep the soil moist until flowering finishes.

Fireside play with. As bold as a piece of sculpture, this steel background adds a sense of theater — along with a measure of safety for nearby plants — into the flame pit. Produced by Koning Eizenberg Architecture of Santa Monica, California, the piece is a 8-by-8 steel sheet attached into a steel framework behind the rectangular concrete fire pit. The steel is oiled to detain rust. Cor-Ten steel, available in sheets like plywood, 3/16 or 1/4 inch thick, is typically used for heavy-duty landscape situations such as this.

Monrovia

Previewing the new and hot (and blue). In a recent seminar of the American Society of Landscape Architects, I had a chance to see what Monrovia nursery believes its hottest new plants. Standouts included ‘Winter Bee’ lavender, ‘Limelight’ rugged hydrangea and ‘Angel Red’ pomegranate.

Most impressive for me was ‘Bountiful Blue’ blueberry. The “blue” from the name doesn’t come in the berries but out of the strong blue cast of the foliage. The blossoms are fairly too: white and small, with a pink blush.

The handsome, compact shrub grows 3 to 4 feet tall. Plant a range of these in rows for an agrarian texture or in masses. Or just plant one or 2 at a shrub border or container.

This blueberry’s most important claim to fame is its ability to thrive and bear a tasty crop past the customary blueberry range (it takes much less winter chill compared to traditional blueberries). A landscape architect told me well ‘Bountiful Blue’ works in her Santa Barbara backyard. That’s a long way, geographically and climatically, from traditional blueberry country — which you understand is Maine if you’ve read Blueberries for Sal for your kids.

Missouri Botanical Garden

Sowing wildflowers and busting myths. Sorry if I am disillusioning anyone, but growing wildflowers in the home isn’t just an issue of scattering seeds, waiting for winter storms, then in spring romping through a meadow of gold poppies, tidy methods and shooting stars. (Do not you love those titles? Were our great-grandparents or whoever did the naming natural-born antiques?)

The fact of California annual wildflowers is that they developed to thrive under very specific conditions of moisture, sun and warmth, and growing most types requires some care. However, the wildflower that is easiest to grow can also be the best known and the most in-your-face gorgeous: the California poppy, either its normal form (shown) or “improved” varieties such as ‘Chiffon’. Other comparatively simple wildflowers include world gilia (Gilia capitata), goldfields (Lastenia glabrata) and ruby chalice clarkia (Clarkia rubicunda).

Mid to late autumn, preferably after the first storms, is the best time to sow California poppy and other wildflowers. (You can also begin with plants in tiny pots offered in early spring.) Select a spot in full sun. You don’t need to cultivate the soil, but eliminate weeds and rake it roughly so seeds have a place to lodge. Cover the dirt with a thin layer of compost and sprinkle it throughly, and stay moist until winter storms do the task for you.

Alder Group, Pool and Landscape Co..

Instead of striving for a meadow effect (which can look kind of shabby-dead after blossom), scatter wildflowers as highlights at a natural-looking landscape, as exhibited here. Combine wildflowers with native shrubs such as ceanothus or with sun-loving perennials such as lavender and salvia. An excellent source of wildflower information in addition to seeds is Larner Seeds of Bolinas, California.

A lesson from minimalism, Arizona style. With just three kinds of stones and plants as a ground cover, this is a striking illustration of what might be called Arizona minimalism (instead of Arizona max, a less sustainable arid-climate approach that utilizes lawns, palm trees and lots of water). Even if you can not grow the totem cactus displayed here, you are able to emulate the keep-it-simple approach.

Fava beans: their humble roots. Half a century before the French Laundry’s menu provided fava beans, the ranchers of the Santa Clara Valley, in which I was growing up, were counting precisely the exact same plant. They called it horse bean, and every drop they planted it into their orchards as a cover crop (“green manure”), which could be plowed back into the floor in spring in order to add nitrogen to the ground.

Growing fava beans nevertheless makes sense. You don’t need an orchard. In a 4- from 10-foot plot, among my neighbors crops favas every fall after she pulls her out berries, has enough beans for some spring meals, then turns over the crops to the ground to enhance the soil to summer plants to come.

The way to grow fava beans. Choose a sunny spot, cultivate the soil and bury seeds 1 inch deep, 4 or 5 inches apart; after seedlings are a few inches tall, thin them to 8 to 10 inches apart. Keep the soil moist winter. Plants grow fast and, as you see here, can grow to be fairly rangy in 3 to 4 feet tall; bet them if you desire a neater appearance.

The New York Botanical Garden

What else can you do in November from the California backyard? Along with the traditional fall chores, such as leaf raking, general cleaning up and up, it is a fantastic time to put in trees trees and all sorts of natives. You are able to plant a new lawn — it is usually much better to go with sod now than seeds. And take advantage of the special planting chances that California offers:

Plant cool-season annuals. Continue to place out seedlings of annual flowers such as calendulas, Iceland poppies, pansies and violas (shown), and snapdragons. For earlier blooms, begin with plants in 2- or 4-inch pots. Be sure to decide on a spot that gets as much winter sun as possible.

Plant cool-season vegetables. These plants are easy to begin from seeds: beets, peas, carrots, radishes, spinach and Swiss chard. These are usually greatest put out as seedlings: broccoli, Brussels sprouts, cabbage and cauliflower. Watch for snails or their slimy telltale trails; place out bait.

Plant spring-blooming bulbs. In November there’s still time to plant all bulbs: crocuses, daffodils, freesias, hyacinths, tulips and ranunculus. Be sure to chill tulips and hyacinths for four to six weeks in the refrigerator before placing them.

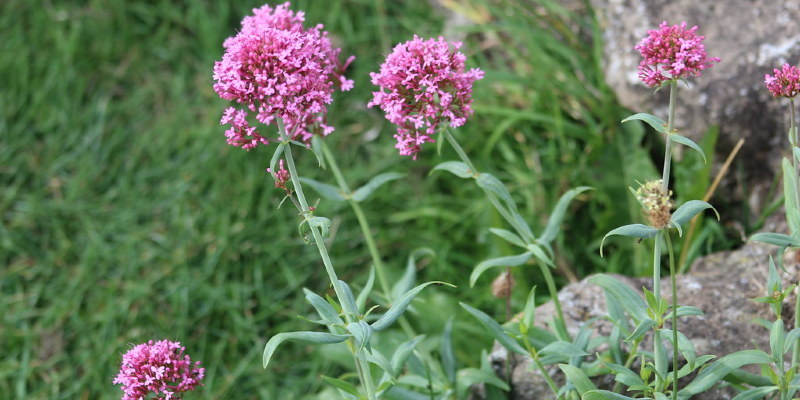
Plant perennials. Fall planting gives perennials a chance to build up strong root systems before blooming next spring and summer. Perennials include lavender, coreopsis, salvia and several others.

See related