The best way to Grow Mountain Ash From Seed

The title mountain ash refers to several kinds of of tree such as the Korean, Australian, European and American types. The dimensions variation from to another can be enormous, with mountain ash reaching heights of almost 500 feet, while mountain ash frequent to the north-west area of the nation. Mountain ash are really not and evergreen angiosperms trees, as well as their leaves include a resin comparable to that in pine.

Growing Problems

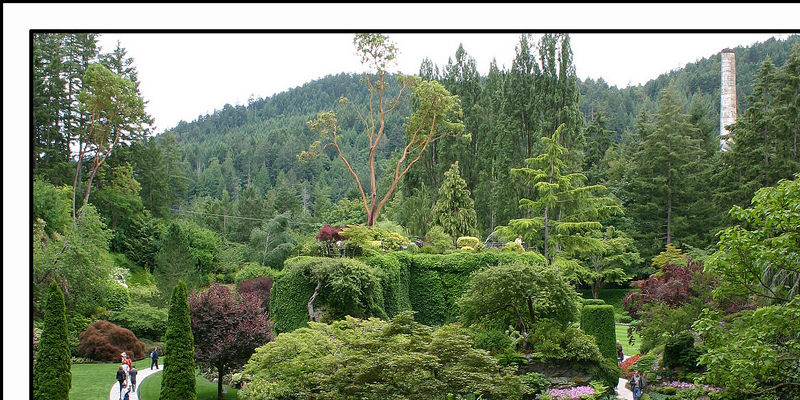
As their title indicates, mountain ash trees are at house in mountainous or hilly places with soil that drains rapidly on steep grades. Soil should possess a pH between 4.7 and 6.0 with a water table no deeper than 2 1/2 toes down. Mountain ash need normal rain, dry winters and partial sunshine throughout the growing period. It’s important to mimic these problems for the tree to prosper. It’s also essential to to find your mountain ash trees within an area which will remain un-developed, provided their possible life span of up to 400 years approximately.

Plant the Seed

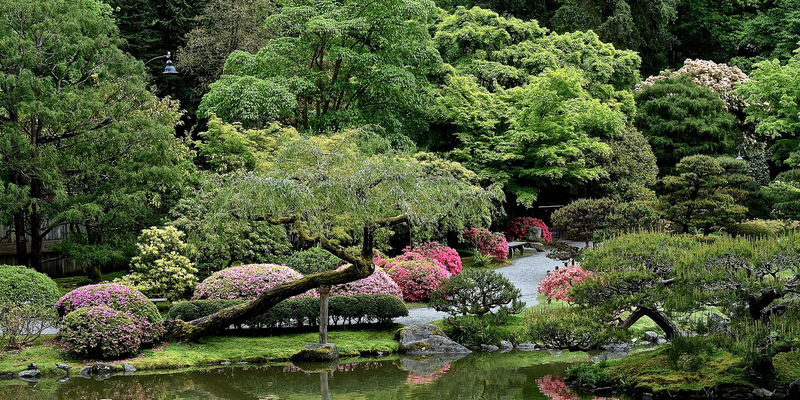
Plant mountain ash seeds in freshly turned soil mixed in a partly shaded region in the summer with peat. Locations with altitudes and cool winters greater than 3,000 feet are preferable, but zones with yearly rainfall quantities of 40 inches or more are also appropriate. Check the depth of the soil where the tree will be planted by you. It has to be deep enough to enable the tree to anchor for a thorough root and effectively community to to make. Seeds planted prior to drop is going to be prepared to sprout spring come.

Development

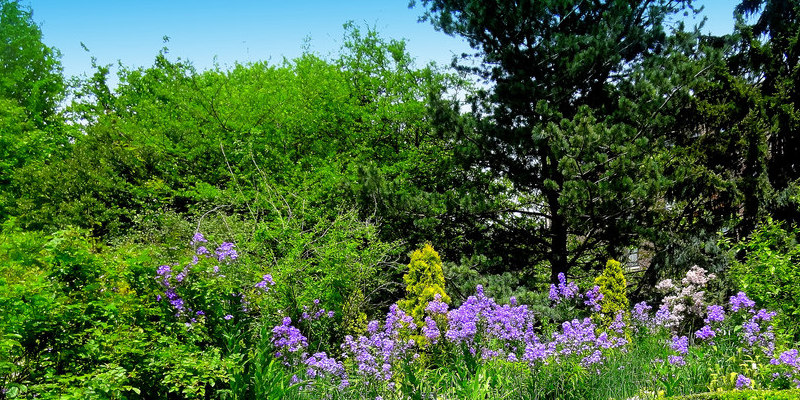
Mountain ash can grow to maturity with no assistance needed by several trees and crops and doesn’t need pruning or shaping. Protect the sapling when just like any other plant that is youthful and susceptible. The tree is a strong breed whose weakness is a susceptibility to ailments and particular bugs. Some borers, leaf hoppers and aphids might try to attack the tree, and ailments like leaf rust, crown gall, scab, fire blight and canker can trigger it injury throughout its lifespan.

Natural Propagation

Fire is one of the propagation. The tree’s hard seed pods burst open and distribute their contents on the bottom when a fireplace does occur in a forest where mountain ash re-side. When the fireplace cools and near-by trees burn off down, leaving a layer of ash that is fresh, the seeds use the sunlight that’s no lengthier impeded by a higher canopy as well as this organic fertilizer, to develop. Ash that is mature trees have when fireplace does show up, a fire-retardant casing which which provides them the upper-hand. In essence the mountain ash utilizes forest fires to gradually takeover any region from trees.

See related

The best way to Prune a Gold Capella Plant

Tropical crops include a lush and unique flair to exterior and interior area a like. A great plant to consider for a an inside container or a warm-environment outside backyard is “Gold Capella.” A cultivar of Schefflera arboricola, the huge leaves with variegation of Gold Capella are certain to be popular and difficult to skip. This flexible plant can be pruned by you to inspire fullness or to keep its dimensions under control. You can prune it to behave similar to a little tree when compared to a shrub.

Pinch growing ideas back. From developing tall and lanky, this can prevent Gold Capella. Carry on to pinch stems back to induce development factors to to create a dense, total shrub as the plant grows.

Prune stems to your desired peak, reducing every one just. To prune the stems as required to preserve a plant that is tiny, perfect for container- Gold Capellas or crops grown outside in a tiny area.

Remove the stems of a youthful Gold Capella. Leave the stem that is strongest to become the the first choice. As the trunk that is new branches out, stop the branches that are lowest. Therefore the plant develops a notable trunk continue to do this over the following three or four years. During these years pinch leading development again to encourage branching. This kind of pruning produces a tree that is little having a complete canopy.

See related

Soil Contamination Testing

You do not have to own a Super-Fund site to take into account soil contamination. Testing for contaminants in house soils is smart in the event that you suspect problems with heavy metals particulates from pesticides or air borne car pollution. Home web sites in cities and at new developments on farm lands or military installations can harbor toxins that are harmful within their soils. Testing of soil samples by laboratories that are private reduce or can verify concerns.

Contaminants

Contaminants are liquid or solid dangerous materials that both bond lodge in the areas between the particles or with soil particles. They might hinder the development of crops, which absorb the contaminants. Harm might also happen to individuals — especially young kids — who in some way ingest these toxins, inhale or contact. If meals grown in soil that is contaminated appear healthy, they might contain large concentrations of toxins. This can be particularly true for root-crops, like carrots, beets and turnips.

Common Resources

Toxic materials can happen in soil, huge steel, including arsenic. More frequently, pollution is caused by human action. Residues from herbicides and pesticides can build right up in the soil of farm lands that ultimately are created as communities. After spilling on the floor, harmful materials, including solvents, might soak into soil. Underground tanks at gasoline stations stations occasionally leak. Toxic waste buried might leach into surrounding soil. All find their way into ground water, which can migrate to the soil of residences that are nearby. Lead is a rock which is well-recognized for cognitive capacity and harmful children’s nervous systems. High concentrations might happen in soil near heavily-trafficked streets or across the foundations of houses constructed before 1978 when exterior home paint contained lead. Another possible source of soil contamination in yards is chemically-treated lumber used for elevated garden beds.

Problematic Re-Development

San Francisco’s manmade Treasureisland is an instance of residential re-development on a former home containing considerable s Oil contamination. The town leased equally islands to the U.S. Navy from 1941 to 1997. The League of Females Voters’ “Bay Region Monitor” notes the Navy started investigating s Oil pollution on the 403-acre island in the early 1990s. With now, the Navy took 900 s Oil 4 and 600 ground-water samples, discovering many toxins. Pre-Cautions contain maybe not enabling gardening to sustain the safety of inhabitants of the 8,000 housing units in the pipeline for the island, the Monitor reviews.

Soil Checks

Some states, excluding California, have co operative extension providers that check house soils. The majority of these testing applications are restricted to analyses of essentials, including identifying deficiencies in organic matter and s Oil nutritional elements. Testing for s Oil contaminants generally happens in personal laboratories. Homeowners seeking contaminant or fundamental testing can acquire lists of laboratories from your California Co-Operative Extension Support. Samples needs to be collected right down inside the region in issue and from several places to A6-inch depth. Then it really is essential to to combine the samples and let the combination dry. Place 1 cup of the combination in a container for example a plastic bag to mail or supply to the lab. Such as with direct pollution, it could be required to to perform checks that are independent for various areas of the yard.

See related

The best way to Move Out Door Plants Indoors In The Event the S Oil Has Bugs

Plants offer greenery outside that is immediate, and tender crops and lots of tropical gain from summers spent in the sunshine. Unfortunately, bugs are also interested in these crops that were lush, plus they are able to burrow deep to the planting medium. By eradicating the bugs, they are prevented from spreading to your own houseplants or invading your house. Begin the procedure in early fall before outside temperatures drop below 50 degrees Fahrenheit. Most crops needs to be brought indoors when the average temperature is comparable to that inside your house.

Spray the foliage using a spray bottle filled with water, rinsing off any bugs that were obvious. Some insects feed on the under side of leaves, therefore spray these are as properly. Hand select any bugs that are remaining in the plant.

Fill a bucket with water -inch lower in relation to the depth of the pot. Use a bucket big enough to spot the pot inside.

Set the pot in the bucket, however do not submerge the best. Soak the pot for 15 minutes to generate pests our of the soil. The water drives bugs from the soil.

Place the pot in a sunny place outside, and permit the water to drain in the pot. Scrub the the outside of the pot using a brush as it drains, eliminating any eggs.

Plants in the soil with serious infestations. Lift the plant in the pot, and remove as much soil as possible from around the roots. Repot into a clear pot of the same dimensions, using fresh potting soil.

Bring the pot in-doors, as it skilled outside and place it in an area where it receives temperatures and related lights. Keep the plant examine it for insect issues before putting it near crops, and separate from your house plants for 30 days.

See related

Filtered Shade Plants

Though vibrant flower shows are what most folks possibly envision when thinking about gardening, shade-loving crops can also perform an essential part in the home landscape. Than seeking to bulk through to flowering plants, generally, concentrating on crops with fascinating and contrasting foliage will offer lengthier seasonal fascination with the shade garden. By critically analyzing your region that is developing and considering outside the hosta-and-fern box, even novice gardeners can produce a lush, great repose in what might seem like a challenging atmosphere.

Care of Shade Crops

New crops in the backyard will take hold quicker and resist tension better though a great several Westcoast crops will tolerate occasionally soils once established. Keep in your mind that places under trees are far more arid, because rainfall reaches the tree as well as the floor itself consumes more of the water that is accessible. Finally, on the issue of of sunshine: several crops called “part shade to shade” will execute properly with three to four hours of sunlight daily, or in areas where some sunlight reaches the floor through leaves or branches.

Groundcovers

Move from the English ivy and periwinkle – these overused crops can swiftly become become invasive and hard to eradicate once established. To protect huge areas, attempt planting indigenous spurge (Pachysandra procumbens) or the Baja indigenous evergreen currant (Ribes viburnifolum). For flowers, take to woodland creeping phlox (Phlox stolonifera), which prefers shady websites and comes in shades from blue and purple to white and pink.

Perennials

Even if foliage is to be the emphasis of the shade garden, spreading crops like coral bells (Heuchera species) as well as the California indigenous columbine (Aquilegia eximia) are two types of of shade-loving crops with seasonal flowers. Japanese forest grass (Hakonechloa macra) and bear’s breeches (Acanthus species) are two sorts of “architectural” plants for shadier gardens, lending curiosity to some space equally through leaf colour and display-halting foliage. Also, in case your curiosity is in grasses, sedge (Carex species) is a great grass like option for shady web sites.

Woody Crops

Several species of shrubs and little trees can impart a sense that is mo Re grounded to the shade backyard at the same time as offer dimension: their peak certainly will become a crucial transitional component in to other elements of the lawn and delivers the eye. Western spice bush (Calycanthus occidentalis) maybe not only needs tiny water once proven, but sports vibrant maroon flowers in spring. Western redbud (Cercis occidentalis), a small understory tree or shrub, puts on an impressive flush of pink flowers in spring, followed by shiny, heartshaped leaves.

See related

The best way to Figure Square-Footage of a Vegetable Garden

It’s time to begin preparing and planting your vegetable garden, but you’re not sure exactly how many seeds to plant, just how many seedlings to purchase or just how much soil enrichment and mulch you will require. Vegetable crops have spacing needs, the quantity of soil enrichment is usually determined in pounds per 100 square feet of location and mulch protection is based on depth per-square foot. Whether you’re a novice or veteran gardener, understanding the best way to calculate the square footage of your backyard location will keep you from over-spending and improve your odds of having a garden that is successful.

Create a sketch of the location where you plan to have your vegetable garden using pencil and paper. Be as comprehensive as possible in drawing the form of the region if there are some and a few sides curves. Skip to Step 3 in the event the form of the backyard is basically a square or rectangle.

In the event the region has an irregular form, break up your sketch into individual sections. Like, one end of the backyard might be by means of of a square as well as another end might be by means of of a triangle. Divide the places up in your sketch. Finding the square footage can be completed by calculating the square-footage for every single section and incorporating the outcomes.

Measure and compose back in your sketch the the size of the sections that are split up or the backyard region. Pick out the measurement in toes in case a measurement is between toes, and gather to the closest foot. As an example, if one aspect actions 11-feet 8″, gather to 12-feet.

Measure one aspect only for an area that is square. To get a rectangular backyard location, you are going to need width and the length. A triangular region will will demand a peak and foundation measurement. You are going to need to be aware of the radius of part or the backyard if it’s in the form of of a circle. The radius is half of the diameter of the circle.

Calculate the square-footage to get part or a square backyard utilizing your calculator. Multiply the amount of the one facet on it’s own. Like, the square-footage of a10-by-1-foot backyard is 1 occasions or 1-0 square toes.

By multiplying the duration by the width compute the square-footage of a backyard location. As an example, the location of a10-by-1 2-foot backyard is 1 occasions 1-2 or 120 squarefeet.

Calculate the square-footage of part or a triangular backyard by multiplying 1/2 occasions the foundation occasions the peak. As an example, the region of a garden having a height of 10-feet in the peak along with a foundation of 15 toes is 15, or 1-5 instances 1-0. Divide 150 by 2, which equals 75 squarefeet.

Compute the square-footage of a round garden by squaring the radius and multiplying by 3.14. By way of example, in the event the round backyard h-AS a diameter of 20-feet, the radius equals 10-feet. The radius squared is 10 instances 100 or 1-0. Multiply 100 by 3.14 to get 314 squarefeet.

In the event you split your backyard up in to individual styles add the square footage for every single section in your sketch. The end result is the complete square-footage of your vegetable backyard.

See related

The best way to Grow the Lolli-Pop Selection of Gerbera Daisies

Gerbera daisies are known for their eye catching big and colour blooms, as well as the Lollipop series is not any exception. As a Gerbera daisy, the Lolli-Pop range has a layer of tiny petals over the the inside of the blooms. These petals that are smaller are generally a darker shade in relation to the again petals that are larger. Gerbera daisies prosper in plant-hardiness zones 9 through 11, experiencing average temperatures. They’re fragile and only one season in many areas although Lolli Pop Gerbera daisies are perennials. For immediate pops of colour that may attract bees in addition to prospective homebuyers, increase the daisies from seedlings rather than seed.

By mixing soil prepare your backyard. Turn the combination about 6″ deep using a garden trowel or shovel. Rake the flowerbed to remove particles and rocks. Till it feels moist at least 5″ below the area water the soil.

Dig a hole in the soil nearly as deep as the crown and as broad as the root ball of the Lolli-Pop Gerbera plant. Place the Gerbera plant to the hole, then backfill the hole by means of your soil combination using a trowel or your fingers. Leave the very top of the crown uncovered to discourage crown rot, which happens in the event the crown stays damp for long of the plant.

Plant extra Gerbera daisies at least one foot apart. The leaves disseminate broadly, and every bloom can best 5″ across.

Mix and use a slow release, water soluble, well-balanced fertilizer, manufacturer the typically of ‘s instructions water, following the like a 141414 per gallon of water.

Water your Lolli Pop Gerberas about twice a week, unless the climate gets regularly hotter than 70 degrees Fahrenheit; water about everyother day, in that situation or more frequently should you see blooms or leaves start to droop somewhat. Water early for the greatest outcomes in the morning.

By clipping them in the leaf foundation with pruning shears, trim withered blooms. In the event that you eliminate the outdated blooms each plant can bloom over once per season.

Fertilize your flowers a T least once every two months while they’re blooming utilizing the well-balanced fertilizer that is sam-e that you employed in the preliminary program.

See related

The best way to Repot a Citrus Tree

Dwarf types of trees are popular as houseplants that are potted. They provide quite foliage, fresh fruit and fragrant blossoms. However they require re-potting every 12 to two years till they attain maturity. A signal that it’s re-potting time is when you see roots coming from the soil area and from the pot’s drainage holes. Repotting a tree is an easy procedure that can revitalize your tree.

Select a pot that’s deeper and broader in relation to the pot keeping your citrus tree. There’s no particular rule for how much bigger your new pot should be, only that it needs to be large enough to give the roots room to grow for at least another year. The pot should have sides that taper down with drain holes in the underside, to the foundation.

Water in the tree for three times to decrease soil moisture. Tip the pot that is existing and roll it on the rim. Lay an old bedsheet on the floor and set the pot onto it. Grasp the tree and tip the pot over while pulling on the tree till it slides onto the sheet from the pot. Roots should be organization and pale. If any roots are slimy and brown, reduce them straight back. Loosen the roots in bottom and the side of the root ball together with your fingers.

Create a citrus planting blend by combining one third peat moss, one third sand and one third sterile potting soil. Put enough of the mix-in the base of the pot that is new to to create the very top of the root ball below the lip of the pot to an inch. Lift the tree and set it up right to the pot that is new. Add soil combine throughout the root ball, tamping it down using the finger tips of your hand s O the soil will help the root ball as you-go across the ball. As you include the s Oil keep the tree up right.

Water the re-potted citrus tree before the s Oil is well-moistened but maybe not sopping-wet. Water your newly tree with water that is enough to keep soil moist but maybe not saturated. After two weeks, cut watering straight back to twice a week for the next 8 weeks. By sticking your fore-finger every one of the way to the soil from then on, check always water wants. In the event the s Oil feels dry, water the tree.

See related

Tree Rose Planting Guide

Roses can supply accents that are stunning in your backyard, forming spectacular aspects of shade above a a flowerbed or a lawn. These crops have the basic form of a tree that is little, using a single slim trunk creating branches that bear flowers and its foliage. Roses require simple rose treatment and several specific consideration to develop into -flowering crops.

The Plant

A tree rose is also also known as a rose common, in accordance with terminology that arrives from Victorian times. The plant consists of a strong rootstock that supports a solitary cane, generally about 3-feet tall. A hybrid that was flowering rose is grafted to the very best of the cane, where its branches will develop and create blossoms. Tree roses are accessible, made from the same procedure but generally no more than 2-feet tall. Roses are available from growing in containers and nurseries both as dormant, bare-root plants or potted.

Preparation

When you buy your tree rose, wrap crown or the portion in a cloth before you’re ready to plant. This can stop becoming dry and also motivate the buds of the plant to swell, supporting the plant get began after planting. Soak it for those who have a bare-root plant. Choose a sunny place in your backyard that receives at least six hours of sunlight daily. So your tops of the crops will have at least several feet between them, in the event that you are planting over one tree rose, program your spacing.

Planting

Dig a hole deeper and broader in relation to the roots of a bare-root plant. Create a mound of soil in the middle, arranging the roots on the mound. The hole should be somewhat deeper and broader in relation to the root ball in case your plant is in a container. The bud union, a bump where the root inventory is met by the cane, should be aboveground le Vel when you’ve got back-stuffed the hole with s Oil. The bud union should finish up-level together with the ground as the plant settles. Give your plant an excellent start by mixing organic or some bone meal rose foods in the base of the hole to the soil.

Final Measures

Swaying in the wind can harm the bud union of the plant, therefore stake your tree rose to avoid this. Drive your stake a T least 12″ to the floor and spot it on the south-side of the plant and avoid sun-damage. Use several ties that are adaptable to secure your plant, tying each in a figureeight with one loop round the stake as well as the other round the cane. Finally your tree watering every times and keep it moist, rose. Feed your tree after it h-AS created, rose particularly blooms, utilizing one created for roses or any well-balanced fertilizer.

See related