How to construct a Tree Planter

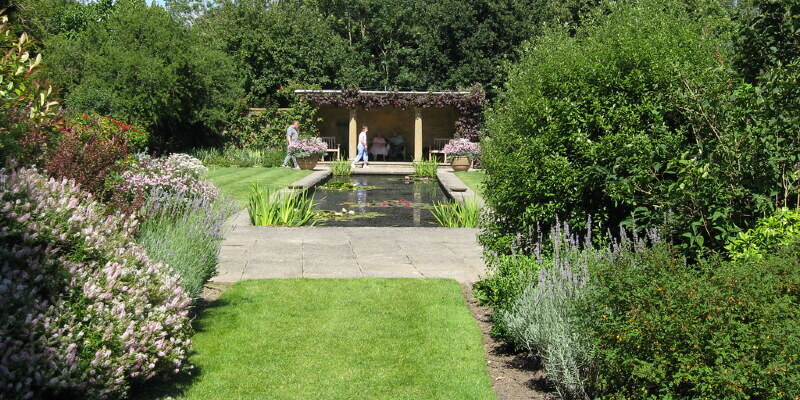
Trees require a rather substantial planting place so their roots can enlarge, although the spread and depth of roots varies among tree species. You may prefer to develop trees in containers if you’ve got a small yard or poor soil, but you must ensure that the planter is large enough to accommodate the tree at maturity. For best results, choose dwarf cultivars, which typically grow far more slowly and smaller than conventional species. You can construct your own tree planter using naturally rot-resistant timber, such as cedar or redwood. The finished planter measures approximately 36 inches tall by 33 inches wide.

Lay six 36-inch lengths of 2-by-6-inch redwood or cedar timber side by side vertically on a flat surface, pushing them as close together as you can.

Measure the entire width of the planks, which should be approximately 33 inches given the actual measurements of a 2-by-6-inch board. Cut two pieces of 2-by-6-inch lumber for this span, cutting with a 45-degree angled miter cut on each end so the surfaces of the planter piece with the sides of a photo frame. To achieve this, the base of this angle cut has to be the exact same length as the board measurement, with the top side of the plank approximately 2 inches longer.

Line up the mitered 2-by-6-inch planks using the top edge and bottom edge of this six 2-by-6-inch planks and screw into place with 3-inch wood screws, using two screws for each of these six planks. This completes one facet of the planter; you must create three more sides to complete the box form.

Stand up the four planter sides, then lining up the mitered ends of the flat boards. Drive 3-inch wood screws at an angle through every corner to assemble the sides.

Cut four 36-inch lengths from 2-by-4-inch lumber and screw them to the inside of each corner to add firmness to the planter.

Cut a square piece of three-quarter-inch plywood to fit over the base of the box, then using a circular saw. The square should be roughly 33-inches by 33-inches, but you should measure the measurements for accuracy before cutting the plywood.

Screw the plywood to the base of the planter box sides using 3-inch wood screws spaced 4 inches apart.

Drill several one-half-inch diameter drainage holes, spaced 6 inches apart, in the base of the planter box.

Line the tree planter box with black plastic sheeting to increase the rot-resistance of this timber. Poke holes through the plastic to line up with the holes through the plywood planter bottom.

Lay a piece of wire mesh hardware cloth over the dark plastic to prevent gravel and soil from falling through the drainage holes.

Spread a 2-inch layer of gravel or broken pottery pieces above the base of the tree planter.

Fill the tree planter using a potting mixture of equal parts sphagnum peat, compost and perlite or sand, leaving a few inches to the container border.

Plant the tree at the planter box to the same depth it had been implanted in the first container. Spread 2 to 3 inches of organic mulch on the surface of the potting mixture to help insulate the soil and retain moisture.

See related

Landscaping Garden Ideas for Where Most Leaves Fall

Autumn weather can be unpredictable, however, one thing is guaranteed: the leaves of your deciduous trees will fall. Raking up fallen leaves keeps your yard tidy, prevents dead areas of grass and reduces places where unwelcome garden insects can nest. Bad landscaping choices beneath deciduous trees can mean extra work to clear the leaves and manage the danger of damaging the landscaping together with every pull of the rake’s tines.

Plants

The plants you remain under your trees should have the ability to withstand raking. This means deep or broad roots and tough leaves. Shallow-rooted plants can easily be pulled by a rake and delicate leaves can be torn, that will open the way for ailments to become in the plant. Once-established, ferns, like sword ferns (Polysitchum munitum), and evergreen shrubs, like winter daphne (Daphne odora) or Oregon grape (Mahonia sp.) , can be raked around and over without damage. Other good choices are perennials that die back before the leaves begin to fall, like coneflowers (Echinacea sp.) or black-eyed Susans (Rudbeckia hirta). Avoid selecting plants that bloom in the autumn, like chrysanthemums, since the raking will ruin the flowers.

Rocks

If planting deep-rooted plants beneath your tree is not possible because of the tree’s compact root system, then you are still able to add interest to the region by placing in rocks. A couple of medium-sized boulders situated with a few smaller rocks produces a natural-looking landscape under the tree. Since the rocks are heavy, they won’t be affected by raking them around them. Avoid creating a wall of rocks around your tree however. This can produce more work for yourself as you try to get behind the rocks to clean up the leaves. Instead, place a couple of classes of stones with enough room between the classes to pull a rake through. Do not pay for the entire area under the tree with river rock; in the summer the rocks retain heat and can overheat the tree’s roots.

Lighting

Lighting adds safety and interest to the garden, but can be a headache when leaves fall. Any lighting beneath deciduous trees must be wireless, like solar lights, or so the wires have to be completely underground. Exposed wires are sure to get tangled in rake tines. At the very least, this will definitely break the wire, but might cause electric shock. You also need to select lights that don’t generate heat, like LED lighting, since dry leaves can catch fire if they pile onto heat-generating incandescent lights.

Mulch

Consider wisely when selecting a mulch for a deciduous tree. Large bark chips and medium-sized bark dust might look appealing, but are easily pulled up together with the leaves as you rake. Fine bark dust remains in place better than other mulches since it doesn’t get caught up in a rake’s tines as easily. When mulching beneath a tree, keep the mulch 6 inches away from the trunk to decrease decay. The mulch ought to be spread to cover the entire area under the tree canopy. Also, keep your mulch layer 3 to 4 inches deep; mulching deeper than this suffocates the dirt and reduces the quantity of oxygen available to the tree roots.

See related

Good Plants for Landscaping a Front Yard

If your backyard is the place where you relax, play develop vegetables, your front lawn is the window on the planet and represents your very best face to the world. “Curb appeal,” the phrase real estate professionals use to describe an attractive front lawn, applies to a welcoming landscape that always looks its best when seen from the street. Landscape your front lawn to provide year old curb appeal with easy-to-maintain, distinctive plants.

Shrubs

Shrubs must soften the corners of the house and form hedges to define the lawn. Evergreens and front doors flanked with arborvitae can mask bases, far as Victorian ladies covered their table legs, but voluminous shrubs finally engulf a house, obscuring the residents’ perspective of the planet. Mix compact evergreen native junipers (Juniperus spp.) Or camellias (Camellia sinensis or C. sasanqua) using dramatic deciduous blue hibiscus (Alyogyne huegelii) or late spring-blooming spice bushes (Calycanthus occidentalis). Define a edge with shade-tolerant, summer-blooming oakleaf hydrangea (Hydrangea quercifolia) or sun-loving, spring-blooming lilacs (Syringa spp.) Plant several different shrubs in groups of three to add variety to shrub borders.

Borders

Front lawns full of blossoms can make a lawn look cluttered and small, but borders can make it look well-tended. Add well-behaved shrubby perennials like lavender (Lavendula spp.) In circles to add variety and depth to a border established by shrubs. A border of shrub roses (Rosa spp.) , also called landscaping roses, completes the cottage impression of a colonial-style house when planted along a picket fence. Northern California native rose meadowsweet (Spirea splendens var. Splendens) is a drought-tolerant spirea that produces rosy blossoms over shiny green leaves throughout the summer.

Perennials

Pick perennials that punctuate rather than just fill space. They have to “pop” to be able to add curb appeal. Whether planted in borders or across the front walk, plants must lead the eye toward the door. Select plants like hostas (Hostas spp.) and daylilies (Hemerocallis spp.) That create an architectural accent with dramatic foliage. Plant bulbs, such as daffodil (Narcissus spp.) and iris (Iris spp.) In a few big, odd-numbered clumps rather than spread out so they provide emphasis. Black-eyed Susan (Rudbeckia hirta) and purple coneflower (Echinacea purpurea) also rise in neat clumps and provide long-lasting blooms.

Ground Cover

Lawns take a beating in dry Mediterranean climates — so much so that artificial grass is easily accessible to homeowners who desire a perfect-looking lawn. Others plant grasses like creeping red fescue (Festuca rubra var. littoralis or F. rubra var. rubra), hard fescue (F. longifolia var. Brevipila) or chewings fescue (F. rubra ssp. Fallax commutate) — slow-growing, drought-tolerant varieties which are easy to keep looking neat. Low-growing plants like Roman chamomile (Anthemis nobilis) and creeping thyme (Thymus “Elfin”) create uneven lawns for front lawns with minimal foot traffic. Native options for ground cover include Point Reyes ceanothius (Ceanothius gloriosus var. gloriosus), Little Sur manzanita (Arctostaphylos edmundsii ‘Carmel Sur’) or pinemat manzanita (A. nevadensis).

See related

The nicest places on Your Yard to Plant Tomatoes

If well cared for, tomato plants yield high yields of juicy, tangy fruit. Start your garden by choosing the perfect spot for your crop to develop to its entire potential. You will have to take soil, sunlight and space into account when making your selection.

Soil

Keep plant roots healthy and hardy with proper drainage. A planting site that’s frequently soggy may result in roots which are limp and week. If the issue persists, your tomatoes may develop root rot. Steer clear of these possible problems by planting tomatoes in well-draining, loosely packed soil.

Sun

Plant your tomatoes in a place which receives six to eight hours of sun every day. Because of the light conditions, avoid planting trees that are near, sheds or some other tall structure which will shade the tomatoes and prevent them from growing nicely.

Space

Choose whether you may stake or cage your tomatoes, as this has some bearing on the amount of space they require. Tomatoes are prolific growers. They will quickly take up large regions of land if allowed to do so. Staking — tying the plant into a wooden stake — and caging — placing a thin cable structure around the plant — keep tomato plants vertical. Consequently, they require less horizontal space. Plant rows of caged or staked tomatoes about 40 inches apart. Individual plants within the rows must have at least 24 inches between them. If you choose to allow your tomato plants to develop a free-form fashion with no heels or bets, keep them at least four feet apart and allow six feet between rows.

Protection

Choose a place of your yard with room to set up simple obstacles to keep rabbits and other pests from your tomatoes. Protect your tomatoes from local wildlife by placing a fence round the garden. This does not typically have to be a huge structure. Inexpensive chicken cable may work. In case you have pets but want edible tomatoes, then it’s best to keep the pet place entirely separate from the garden.

See related

How to Hang a Bear Rug to a Wall

Bear rugs have been a staple of uber-masculine decor likely since cavemen buddies stood around and argued over how to attach them for their own rough stone walls. Men have definitely evolved since then, but that primal impulse to display their trophies will be hard-wired in. And that is OK. Hanging a bear rug is not in any way difficult, especially when compared with the effort involved in removing it from the bear.

Tape enough sheets of paper together with small strips of painter’s tape to cover the bear rug.

Set the paper on the ground and carefully place the bear onto it. Attempt to manage the rug as gently as possible to avoid damaging its fur.

Trace around the bear with a marker. Making a pattern can allow you to discover where to hang the bear without attempting to hold it up against the wall.

Slide the paper carefully out from beneath the bear. Do it the way nurses change sheets around a patient — lift or roll one side of this rug up and scrunch the paper under it as far as you can toward the opposite side. Lift the other side of this bear rug and slip the paper from beneath it.

Hold the paper pattern up against the wall until you are certain of just where you want the rug to hang. Attaching it to at least two studs will keep it hanging securely, especially if you live in a place which experiences earthquakes. Lightly mark in which the paws and mind will go.

Lay the bear rug on its back. Most taxidermists attach felt pads to make it easier for you to hang your bear. Utilize a curved upholstery needle to attach D-rings to the bear mask, ensuring to poke the curved needle during the felt and to the backing to ensure a safe grip. Put one D-ring on each paw and another on the underside of its muzzle, and one in its middle, for a minimum of six. If it’s a really heavy watch, attach a couple more D-rings in your discretion.

Place the paper pattern in addition to the bear rug and mark in which the D-rings are. Hold up the pattern to this walland lining it up with the marks you created previously. Mark in which the D-rings are.

Attach small hooks to the wall in the places you marked. Use wood screws to attach the hooks to the fireplace. Drill holes to get the drywall anchors and tap them gently into place with a mallet. Expand the hooks to the drywall anchors.

Mount your bear on the wall by scaling the D-rings over the hooks.

See related

Honeysuckle That Propagates in Summer

Honeysuckle (Lonicera spp) includes both deciduous and evergreen shrubs and climbing vines. Its U.S. Department of Agriculture plant hardiness zones vary by species. Vine varieties twine about trellises and fences, and shrubby varieties make great plants for borders and ground covers. Propagation timing and techniques vary, as evergreen varieties are propagated in summertime utilizing semiripe cuttings, while the deciduous honeysuckle varieties are propagated in the summertime using softwood cuttings.

Honeysuckle Varieties for Summer Propagation

Honeysuckle varieties that spread in summertime contain both climbing and tree varieties. Coral honeysuckle (Lonicera sempervirens) is a twining vine that grows in U.S. Department of Agriculture plant hardiness zones 4 through 9. This plant produces scarlet-orange tubular blooms in summer and red fruit in winter. Winter honeysuckle (Lonicera fragrantissima) is a deciduous tree hardy to USDA zone 4. This variety produces lemon-scented white blooms in spring.

Taking Evergreen Semiripe Cuttings

Semiripe cuttings are taken from your current year’s growth, meaning they are woody at the base but soft and pliable in the tip. You may take these cuttings in late summer during the center of autumn. A semiripe cutting is company and snaps when bent. The cutting edge should be an 8- to 12-inch piece taken from a side or leader shoot and cut straight under a node. You may remove the tip of the shoot and the bottom set of leaves, leaving a 3- to 4-inch piece with at least 2 nodes.

Taking Deciduous Softwood Cuttings

Softwood cutting are taken in summer during the growing season. These cuttings are soft, flexible new development, which offers the ideal chance for more growth and successful rooting. To take softwood cuttings, remove about 4 inches of stem above a bud or node of the parent plant. You may store cuttings in a plastic bag in the fridge if it’s impossible for them to be planted straight away.

Attention of Honeysuckle Cuttings

After you have taken cuttings, dip the cut end (in which you severed the stem from the plant) into a rooting hormone. You can use pots full of equal parts perlite and peat moss or perlite lonely. Poke holes in the growing medium, and add softwood or semiripe cuttings. Spray the plants with fine mist, and set the pots in a shaded, but not dark, place. The pots will need to be kept in a warm room. To help retain moisture and heat, you can place a plastic bag around the grass.

See related

How to correct a Sticking Revolving Corner Cupboard

A revolving corner cabinet, also referred to as a lazy Susan cabinet, can be prone to sticking and rubbing if not sometimes maintained. Issues arise when something is spilled or a few object falls from the back and gets under the bottom tray. Other causes include overloading the tray or difficulties with the hardware slipping. Don’t live with an annoying cabinet like this. A fix can be performed using a few simple tools in under one hour.

Remove everything from the revolving trays. This could truly be the issue. In case you have an excessive amount of weight on one side in the bottom, it could bend the tray down on one side far enough to make it rub on the underside.

Reach all the way behind the bottom shelf. Feel for any objects that might have fallen off the tray and remove them. Use a small, flat rod to slide under the bottom tray to dislodge any other small items which might have gotten under the tray.

Spin the tray with your fingers. If it dips down on one side when revolving, the tray is bent. Place the flat stick below the side which dips down and pry it up a bit at a time until it revolves apartment without dipping.

Spin the tray with your fingers. In case it still rubs, the article or mechanism may have slipped. There is a bushing on the bottom shelf along with a setscrew in the bushing. Spin the tray before the set screw revolves around where you can view it.

Insert two wooden wedges on each side of the tray. Push them under just enough to encourage the tray and stop it from going. Use a screwdriver to loosen the setscrew. Catch the article with your hand and shake or wiggle it until it drops or slides. You might also have to wiggle the tray with one hand or lift it a bit. This will enable the article to fall down through the bushing around 1/4 inch or more. This will provide the bottom tray more clearance since it will be positioned slightly higher on the article. In turn, it will be less inclined to scrape anything when the wedges are eliminated. Tighten the setscrew with the screwdriver and remove the wedges to complete the repair.

See related

Planting Poppy Seeds & Killing the Weeds

Poppies (Papaver spp.) , grown because of their vibrant, showy blooms and attractive seed pods, comprise both perennial and yearly varieties. You can develop them readily from seed sown directly in the garden. Removing weeds before planting and preventing the future increase will make growing your poppies easier and much more rewarding. Mechanical procedures for weed removal include hand drawing and tilling. Other procedures include herbicides and mulching. You will likely need to use a mixture of these methods to get rid of the weeds.

Mechanical Weed Removal

Prior to sowing poppy seeds, then you are going to need to eliminate weeds from the planting area. The reliable procedures of weed removal from hand-pulling and tilling need effort and time but are environmentally safer than chemical processes. Till or dig to a depth of 12 inches to guarantee elimination of deeper weed roots. Normally, when you have weeds in an area, the soil in that area also has weed seeds. You’ll probably have to take additional steps to prevent new weeds from invading before you sow your poppy seeds.

Growing Poppies

Plant poppy seeds in autumn for spring blossoms once you’ve pulled weeds from the bed. In regions with longer growing seasons, you can sow seeds in late winter or early spring for a fall crop of blossoms. Texas A&M; University recommends scratching the seeds in using a rake and keeping the planting bed moist. Many of the yearly poppy species will continue to self-sow in case you leave the pods on the plants. Poppies grow best in full sun and in rich soil that drains well.

Mulch

The importance of mulch in weed prevention is hard to overstate. Mulch prevents weed germination by blocking sunlight to dormant weed seeds at the top layer of soil. Once poppies begin to demonstrate growth, apply a 2- to 3-inch layer of mulch to the planted area. Do this early spring and again in autumn. Preventing competition for resources from weeds will help the poppies thrive. Great muclh options include compost with or without aged manure, and ground bark or hardwood.

Herbicides

Preemergent herbicides work by blocking weed germination. Apply these in spring and again in early summer to stop cool- and warm-season weeds, respectively. Avoid using these too early in the growing season as young poppy plants may be injured, along with the weeds you are trying to avoid. Wait until poppies are 6 inches tall before having a preemergent herbicide. Short-acting post-emergent herbicides, like glyphosate, degrade quickly. You can use these safely as controlled spot treatments to kill individual weeds while poppies are actively growing or blooming, so long as you take care to avoid spraying the poppies.

See related

How to Mix Flooring Materials at the Same Room

There are a lot of floor materials you may choose to utilize in exactly the exact same place, all which have various advantages and disadvantages, styles and patterns, and general thicknesses. When it comes to mixing different materials together in precisely the exact same room, color and patterns are of less importance than material type and thickness, since all of them need to flush with one another in the end.

Colors

So far as colours are concerned, you might mix and match according to your personal preferences, because there are no set-in-stone design rules. But certain colours complement each other, and others have been utilized to contrast for quite specific aesthetics. For instance, one might opt to utilize a dark all-natural stone such as brown granite using a light-colored hardwood floor such as pine for a contrasting look. Alternatively, a dark-colored wood such as cherry matched up against a dark-colored all-natural stone or rug gives you an overall synergy between both different floor materials.

Transition Strips

Transition strips typically are used between two materials that have distinct finish heights in which you cannot control the actual height of each individual floor perfectly, ending up having a lip in which the two match. You will find an assortment of different types to choose from, such as T-strips in which the vertical section sits between both materials and the top horizontal section sits on top. A reducer strip installed between carpet and tile using a ramp reduces the height from the tile into the carpeting. Other types of transition strips comprise custom tile patterns, such as transitioning the door, or thresholds strips made of marble. Transition strips can be wood, metal, rubber or plastic too, and you’ll be able to create custom strips if your floor isn’t defined by commercial specifications.

Underlayment

No two materials are the exact same thickness, which means the complete height of a given floor material will be different than that of the other. While not all floor materials need underlayment, it can be utilized to build up the height of the floor to match the other floor material. Take hardwood and tile, for example; the traditional thickness of wood far exceeds that of a traditional tile setup, where wood is around 3/4-inch thick, tiles are 1/4-inch thick, and the underlayment usually is 1/4 inch. In order to constitute the excess height, you can use 1/2-inch underlayment board to develop the tile so that its complete height flushes the exact same as the hardwood floor. Additional layers of subfloor can be added to increase the height where required below a particular finish material.

Drop-Down Flooring

In extreme cases in which a floor is designed around a particular subject, specific thicker-than-normal materials such as flagstone are utilized. Flagstone thickness varies due to the inconsistencies of nature, oftentimes ranging between 1/4 inch around 3/4 inch or thicker. It is not possible to flush flagstone material with carpeting or hardwood utilizing traditional installation procedures. Instead, a special section of this floor is created with floor joists that are lower compared to the remainder of the floor. This is known as a drop-down floor. The substance will be installed on the hardwood flooring first, then the dip floor is built up so so that the materials flush on top. Employing the flagstone instance, a bed of deck cement (also known as deck mud) is placed down at the drop-down area of thickness between 2 and 3 inches, and the flagstone substance is pressed down to the bed of brick till it flushes out using the hardwood. Other materials have various ways of being built up, which range from cushioning to layers of underlayment or even more subfloor layers.

See related

The way to Decorate a Kitchen With Under 100 Dollars

Kitchens are often among the most expensive rooms to decorate in a home. Costs accumulate quickly, so that many homeowners simply do not have room in their budgets for such a renovation. There are, nevertheless, many economical ways to refresh a kitchen for as little as $100. Save money by purchasing at places like dollar stores and thrift stores. Decor items are as close as what can be found in a homeowner’s kitchen cabinets. Paint adds to the overall look of a tired kitchen space. With just a little imagination, a brand new kitchen decor can enjoy with friends and family.

Wall Paint

Paint the walls. Among the least expensive ways to decorate a space would be to use paint. Choose a shade that provides the room a visual lift, like delicate creamy or yellow tan. Light colors make a room feel expansive, reflect light and also assist accent all kinds of cabinetry as well. Shop for types which include a primer and paint in 1 formulation to avoid the additional expense of purchasing a separate primer. In addition, select one-coat paint varieties, which reduce the amount of paint required, which can be important when money is a major consideration.

Attractive Ebay

Display kitchen items. Go through the cabinets, and use regular items in different ways. Hang colorful pots and pans on a rack for a touch of color. Take pastas and dried ingredients, and also show them in plain jars on a counter area. Put a group of baking and cooking books on shelves to give the kitchen a gourmet look. Hang supper plates on a soffet area using plate hangers. Remove an upper cabinet door, and then line the inside with wallpaper. Use this area to show a group of glassware or dishes for a cheap kitchen decor with optimum visual appeal and creative style.

Window Treatments

Create DIY window treatments. Fabric adds color, design and texture to spaces to give a new look to rooms. With this in mind, decorate the kitchen using new, inexpensive window treatments using unexpected materials. Press several napkins, and hang them over a curtain rod, point down, for a very simple window treatment. For a vintage kitchen, remove the curtain pole, and hang a jute rope across the rod area. Take a variety of antique handkerchiefs, and use clothespins to hang them in a horizontal fashion. Sew a pole pocket on the back of 2 matching table runners, and hang them for easy curtain panels to accent the entire space. Thinking in a creative way frequently makes an affordable kitchen decor project cheaper.

Decorative Accessories

Use inexpensive accents. Proceed to the dollar store, and purchase a pair of placemats and napkins. Utilize them to accessorize a counter area or little kitchen table. Big-box stores frequently have discount flowers. Display them at a thrift shop vase for a touch of color. Put a bowl filled with apples, lemons or oranges on the counter as an easy way to give the kitchen a fresh look. Shop thrift stores for old salt and pepper shakers, antique pitchers or antique canisters, and add them into the kitchen decor. Last, place vibrant scrapbook paper in dollar-store frames to additional accent the color scheme of the room for a kitchen space high on style for very little money.

See related