The best way to Scribe Tile

When installing glass, ceramic, rock or vinyl tile for counter tops, flooring or backsplashes, you’ll need to reduce on your tiles to to match the the area where the tile abuts partitions, built-ins, wall sockets and switches. Scribing the tile is a procedure which lets you prevent measurements that are complex. Do-it-yourself shops will most likely cut the glass, stone or ceramic tiles that are scribed for yet another fee for you. Your house worth will be added to by new tile.

Put in a row of tile as much as wall socket or a wall, leaving room to get a tile that is partial. Put a one quarter-inch spacer alongside wall socket or the wall.

Put a bit of tile right along with the last tile close to the place of wall socket or the wall. Here is the tile which is scribed.

Put a tile on the tile to be scribed, flush with all wall socket spacer or the wall.

Draw on the scribe line using a pencil on the central tile in the border of the best tile that is overlapping. Make use of the line as helpful tips for reducing on the tile that is scribed.

See related

The best way to Paint a Focal Wall

One simple method to customize the appearance of a room would be to put in a wonderful pop of colour on a wall that is focal. These emphasis walls let you put in a darkish or daring colour to your own living room without going way on the top. Make use of a wall to bring focus to eye-catching architectural characteristics including a big hearth, an uncommon window or a little alcove. An accent wall can be utilized particularly when paired using a fascinating little bit of artwork to include interest to your wall.

Preparing to Paint

Choose a colour for the wall that is focal. Choose a colour that contrasts nicely with all the other colours in your chamber. Decorators often advocate using colors oranges, daring blues greens or reds to create emphasis walls actually get noticed. Remember that paint colours that are darker frequently need multiple layers to reach protection that is solid.

Remove in the wall and take any draperies down. Whether you can find power outlets or switches on the wall, switch the electricity off to the area after which make use of a screwdriver to get rid of the plastic handles. So that you do not drop them tape the screws to the trunk of the covers. Move furniture from the wall. By draping them with drop cloths shield any lighting or architectural characteristics.

Ready the top of your wall that is focal. Wipe it down using a moderate home cleanser and also a rag. Fill in little cracks or just about any nail holes having a lightweight, quickdrying spackling co mpound and then sleek it out with sand-paper once it is dry.

Lightly sand the wall with 120-grit sand-paper to make an open surface for the paint. Brush or vacuum off surfaces to get rid of dust.

Distribute painter’s tape along the borders of ceiling and the wall and against the borders of any wainscot or trimming. Lay down drop cloths from staining your flooring to avoid paint drips.

Painting

Stir having a paint stirrer to ensure it’s well mixed. Wet A2- to 2 1/2-inch-broad paint-brush with water.

Dip your brush to the paint, ensuring you fully saturate the onethird of the brush. By pulling the paintbrush from the right or left side of the paint can to eliminate any extra paint decrease the potential for random drips.

Cut in your wall that is focal. Begin base Board or in the top-left corner, paint along the edges of the ceiling, down along side it corner, across a floor and down another side corner. Paint in instantly wipe-off any paint drips or malfunctions having a rag and even lines.

Pour right into a paint t-Ray. Dampen roll it ensuring to fully cover the roller and a paint-roller with water. Press on the roller close to the most notable of the paint t-Ray to squeeze-out extra paint.

Roll the model of a big “W” onto the middle of your focal wall. This gets most of the paint on the wall. Use over-Lapping up-and-downstrokes to equally spread the paint out. Repeat this method before the complete wall is covered by you.

Permit the paint to dry in line with the directions of the manufacturer’s. Apply another paint coat for the results that are most appealing.

See related

The best way to Set Up Vinyl Foundation Cove Molding with Adhesive

Cove foundation is usually installed across the bottom of a chamber to remove an ugly seam also to soften the transition between the wall as well as a flooring. Such a attribute, although unimportant in a home, can have an important effect on the attractiveness to prospective buyers of a property as well as the look of an area. Cove foundation, also called vinyl molding, is popular because of its durability, affordability and comparatively simple setup in residential and industrial uses. Appropriate setup must make sure that the vinyl molding will stay connected to the wall as wanted for a length period of time while seamlessly fitting in with all the style of the chamber..

The foot of any stuff that are surrounding and the wall. Sweep or or else eliminate all particles and wipe the use place clean using a moist rag. Allow the area dry completely before using the moulding.

The vinyl cove molding if it is bent or arrived in a roll. Unroll it, place items like novels on it to make sure it stays level, if needed, and allow stuff sit to get several hours.

Lay the moulding from the wall out and program the setup. Make marks on the moulding where it should be scored and bent to match or around corners and where any cuts should be produced. To make sure that curves and the scores are set as totally as you possibly can in the corners, match the moulding from the wall, where just the corner or 2 will probably be in your course round the area, gauge and prepare these sections of the moulding.

Rating and turn the vinyl or cut molding to adapt corners. When when coming up with scores or cuts, place along with a related substance or backerboard to defend the underlying area. To to match the moulding snugly against interior corners, lightly score the rear of the moulding having a utility knife and reduce a notch in the root of the moulding across the score line. To to match the moulding around some other corner, warm the region of moulding using a blow dryer until it becomes additional pliable, then turn the moulding to show its backside and make use of the utility knife to vigilantly shave a a skinny layer from the back-side of the moulding therefore it might turn around the corner.

Apply adhesive to the rear of the moulding utilizing a a skinny bead of adhesive in a zig-zag routine to make sure coverage. In addition, you might trowel with regards to the sort of adhesive employed. Use an adhesive intended for for use using the precise molding merchandise as well as the wall substrate to attain perfect bond.

Press on the moulding with adhesive hard to the bottom of the wall.

Roll on the whole molding surface having a Jroller. Press all air out and be certain that moulding and the adhesive are fully in experience of the wall.

Clean the region utilizing a rag to wipe-off any adhesive which was forced out from behind the moulding through the rolling procedure.

See related

The best way to Paint Outside Aluminum

In the event you’re crave a change and fed up with the colour of your house ‘s outside, the aluminum siding can be painted by you. Picture is more affordable than purchasing new siding, plus it provides your home a refreshed look. Without selecting expert painters it’s possible for you to manage the project yourself but an exterior paint work is labor intensive. The important thing to some smooth-appearing finish will be to prepare the use and area exterior primers and paints.

Siding

Before cleaning it analyze your property ‘s aluminum siding for direct. Evaluation kits can be found at hardware shops. Screening needs to be performed on all houses built before 1980, although paint was essentially banned in 1978. Hire a professional lead abatement professional to eliminate any lead-paint, as doing it yourself can produce dust that is hazardous and contaminate the soil throughout the construction. When inhaled or ingested, lead could be extremely bad for people, particularly kids under the age of 6 and pregnant girls.

Ready the work area by covering the earth or leaves with dropcloths. Develop a cleansing solution by combining portions of baking soda, bleach and water in a pail. TSP is usually advocated for the cleansing of surfaces to be painted although replica types might be around, but it’s prohibited in California. Wear heavy duty work gloves to guard your hands in the substances.

Saturate an abrasive cleansing sponge in the the answer and rub it to get rid of any powdery mildew or paint deposits. Rinse the siding clean using a hose.

In the event that you are focusing on a sizable region put on the cleaning solution to the siding using a pressure washer. Equip the pressure-washer using an enthusiast as well as a garden hose -spray point, and fill the reservoir with all the cleansing the clear answer. Spray the solution on the house-but prevent capturing at the water beneath the strips of siding. Rinse the top clean with basic water in the hose. Enable the siding to completely air dry.

Paint a single layer of an oil on the aluminum siding -centered acrylic primer designed for for metal surfaces. Utilize a brush to protect tiny are as as well as a roller to cover big regions. Permit the primer to dry about two days before applying the top coat.

Paint the aluminium using 100-percent acrylic outdoor topcoat paint. The siding with two coats of paint, enabling it to dry between layers.

See related

The best way to Make Use Of Tin Roof Panels In-Room Redesign

While tin roofs aren’t common as they used to be, there are many ways classic tin roof panels can be incorporated by you in to your house ‘s design strategy. Tin roof panels are corrugated and fit together to make a “puzzle piece” roof. Rely on them to enhance bedroom or an office; abandon them as-is or paint them various colours. There isn’t any incorrect method to make use of tin roof panels so long as they make use of a the motif and can’t cut of a chamber or otherwise harm passers by.

Bedroom Thoughts

Use tin roof panels as a fascinating bedroom wall layout choice. Cut the panels into sections which can be about one or two feet broad, though you may make the sections smaller or bigger in the event that you would like. Attach to the wall with 2-inch screws for every 18-inches of panel. Make use of the panels make a whole wall of tin roof panels, or to enhance the four corners of your area. You may also choose to stagger the panels and use collages or paint of rubbish wallpaper between the panels. Paint the panels distinct colours as yet another alternative.

Kitchen Tips

Decorate your kitchen with tin roof panels by using them to improve cupboards and work islands. Be sure you quantify your island and cupboards first prior to making the cuts that are correct in your tin roof panels, and use 2-inch screws on the corners of the panels to to add them to cupboards or the island device. Paint the panels as desirable before attaching them or leave them as-is for a pastoral appearance.

Living Room Thoughts

Use tin roof panels to produce bookshelves that are interesting for recreation room or your family room. Quantify simple wooden shelving units prior to making cuts in your roof panels use 2-inch screws to to add the panels in the corners of every panel to both sides of the bookshelf. Put in a panel to the most notable of the bookshelf at the same time if wanted/appropriate. Paint various colours or the panels one colour according to the colour scheme of the room.

Toilet Thoughts

Put in a tin roof panel to your own own bathroom door on the exterior to generate a sort of “hot tub entry.” Quantify the do-or before attaching and slicing the panels with 2-inch screws in the do or corners. Use tin roof panels to make a fresh ceiling to your bath, if appropriate. Make sure to take all ceiling mild fixtures out before installing , nor cover your own bathroom port using the panels. Thin styles of panel can be utilized to generate a wall-ceiling edge in some room of the dwelling or your own bathroom.

See related

The best way to Clean an Ac Reunite Port Cover

Air conditioner reunite port covers, as their title suggests, conceal the return ports, which pull air in your air conditioning before it’s redistributed throughout each chamber. Port covers could be blown off, although home-owners could possess the ducts cleaned within their system care. Other and dust particles that becomes caught in the slats of the port cover might ultimately be pushed into your house’s atmosphere system. Dust which makes its way in your AC duct method not only irritates allergic reactions, but nevertheless, additionally, it may cause your system to work more challenging, which makes it less electricity-saving.

Switch off your air conditioning in the breaker.

Hoover as cobwebs much dust and debris as you possibly can in the port cover slats. You can find them helpful in this, in case your vacuum has fasteners, like a tool.

Eliminate the screws that hold the port cover in position, utilizing a screw-driver, and set them apart. Pull the cover from the wall. Some port covers are held in by clips. Raise or press the clip on top if that is the situation and pull the port cover up and out to produce it from the holders at its foundation.

Fill your sink or bathtub using a solution of warm water and dish soap.

Immerse the port cover and leave it to soak to loosen filth and debris.

Take away in the water and scrub both sides using a moist cloth. Clean between the slats of the port cover using a foam paint brush that is damp.

The port then place it to dry and cover completely with water.

Place on its environment that was great and blow air to crevices and the joints of the port cover to dry any dampness that could have pooled in the slats up. It will help to stop rust from forming after.

When it’s completely dry the port cover.

See related

The best way to Set Hardwood Flooring Against Brick

The gentle luster of an all-natural hardwood flooring adds warmth and character to your chamber, and with nominal care and maintenance, it may survive for decades. It’s possible for you to place hardwood flooring over an existent brick ground, but you’ll must build a sub-floor first. You can even install hardwood flooring in an area with present brick walls using a unique technique to to install the base Board to partitions. Now’s hardwood flooring nailers simplify the setup process. The sole caveat is the chamber needs to be above level to decrease the chance of humidity and wetness harm to the hard-wood.

Construct the Sub-Floor

Cut and measure 2by4 boards to to create a perimeter frame across the area, making a 1/4 inch opening between the wall. the planks and

Attach to the brick flooring with screws. Then and the easiest way to do it is to put the planks in place drill holes using a hammer fitted using a 4 inch bit that is concrete. Drill through the brick before employing a standard drill to fit 2 3/4- and through the planks inch screws in every hole. Counter sink the screw

Install added 2 by 4 boards on 16-inch centres. What this means is you will measure to the middle of the next in the middle of a single plank when ascertaining the layout. Insert and drill holes screws every 16-inches as you did on the margin boards.

Run a 3/8-inch bead of sub-floor adhesive on the middle of the floorboards and install 4-by-8 sheets of tongue-and groove sub-flooring. Attach to the floorboards with decking screws, spaced 8″ apart. Make a 1/4-inch opening between the border of the walls. the sub-flooring and The seams of the panels will satisfy in the middle of the boards since the floorboards are 16-inches aside.

Sweep and vacuum the sub-floor and put in one layer of 1-5-pound felt paper, utilizing a staple gun to connect the paper that is felt to the ground every 12″. Bottom sensed paper borders however tend not to overlap them.

Lay the Hard-Wood Boards

Area 3/4-, and lay the primary hardwood board in the corner across the wall inch spacers on the rear of the board to keep it 3/4 inch a way from the side and The tongue fringe of of the board faces out.

Fit a complete nailer -inch finish nails and area nail the primary hardwood board set up by capturing on one nail right down through the board over each joist. The nails should be 1/2 inch from the rear of the board.

Set the hardwood board over the wall alongside the primary board, utilizing the spacers to keep it a way from your wall, as you did the first, and nail it. Continue till you get to the wall, adding boards to the initial row.

Quantify to the wall from the final board and subtract 3/4 inch. Then a-DD the breadth of the tongue. As an example, in the event the space from the final board to the wall is-16 inches, subtract 3/4 inch and adding the breadth of the tongue, which is usually 1/4 inch broad. The last measurement is 1-5 1/2 inches. Cut the final board as you did all of those other boards in the initial row to fit and do the installation.

Begin the 2nd row together with the plank you cut off from your end of the primary row. Work with a spacer involving the end-of the wall and also the plank and suit the groove of the plank snugly on the tongue of the plank in the primary row.

Place a hardwood flooring nailer contrary to the tongue of the plank right over a joist. Depress the plunger on the flooring nailer to shoot at a complete nail a-T a 4-5-diploma angle through the very best of the tongue and to the joist. Whenever you shoot at a flooring nail, the nailer drives the hard-wood boards closely together.

Add boards that are added to the row, utilizing the nailer to to add them. Cut on the last board as you did for the primary row till you get to the far-side of the area and repeat the procedure.

Quantify the remaining area between the final row of the wall and also boards, subtract 3/4 inch and you did for the preceding. the conclusion bits on, then a DD the tongue width measurement as

The final row of boards down the center suit them in spot and to coordinate with the measure.

Because there’s perhaps not room enough to make use of the hard-wood flooring nailer because of this row as you did the first-row nail the last row of boards.

Fill the nail holes to the primary row of boards and the final row of boards with wood putty that matches the hard-wood flooring.

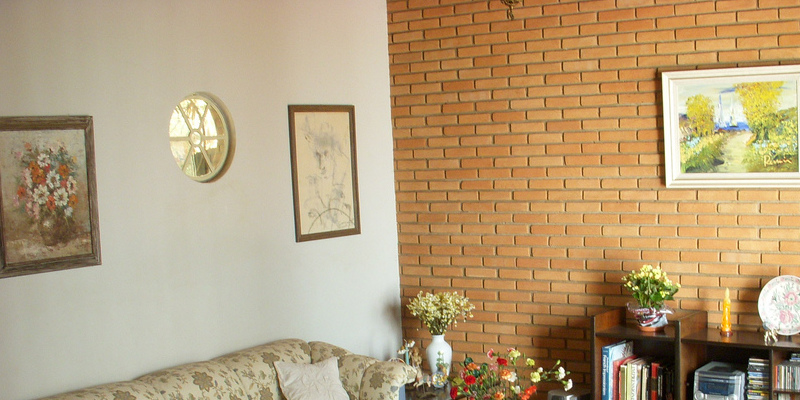
Install baseboard to protect the opening involving the wall as well as the hardwood. Generate a complete nail about every 24-inches across the baseboard right into a mortar joint, in case the wall can be brick.

See related

The best way to Cut on the Ceiling Framework of a House

A typical residential ceiling contains either a joist program or a truss program featuring flat members that form the ceiling framework. In case your ceiling has joists, it is possible to cut on a lot more or one to install an attic fan, a pull-down ladder entrance or a fixture that is similar. Cutting on joists in the ceiling framework necessitates installing headers that bridge the joists that are next. Nevertheless, you can’t reduce it with no engineer first discovering how better to transfer roof load in case your ceiling framework is made of trusses.

Quantify snap chalk lines to signify the measurements and rough opening measurements on the ceiling. If you’re installing a pull-down attic or ladder fan, tough opening measurements needs to be recorded on an installment sheet or on the outside the carton. Assess the back-side, excluding any trim if you’re installing a fixture that is secondhand and utilize that for the tough opening measurement.

Cut on the ceiling dry wall over the chalk lines using a sharp utility knife and take away the center drywall segment. This may disclose more or one joists.

Make pencil marks on the joists you’ll be removing. This is better done in the loft. Make a mark on every end, 1 1/2 inches broader than the rough., should you be removing just one joist Make the marks 3″ broader in relation to the opening, if you’re eliminating 2 or three joists.

Cut on the joists that were marked in the very best, utilizing a saber saw. Don’t cut through the gypsum board. Remove the cut joist(s).

Assess the space between the total joists on both sides of the cut joists. All these are trimmer joists. Typical ceiling joists lay on on 2 4-inch centres as well as the the area between them is 2-2 1/2 inches. The the area between the trimmer joists needs to be about 4 6 1/2 inches. in the event that you eliminated one joist The space is likely to be nearer to 70 1/2 inches. in the event that you eliminated two joists Constantly quantify, yet, because there may be small variations in the lay-out.

Cut two planks in the event you eliminated one joist to make headers that are solitary, and minimize four planks in the event you eliminated two joists to make doubleheaders. Cut on the headers from exactly the same measurement of timber as the joists. By way of example, in the event the joists are 2-by-6s, the headers must also be 2-by-6s.

Place a header involving the joists that are remaining and in a rightangle to equally. S O along side it suits snugly contrary to the rest of the stub of the cut joist slide the header.

Fit a framing nailer with 16 nails that are d and add two nails, equally spaced, in to the end-of the stub through the header. Reach across the outdoors of the total staying joist on a single side and shoot at 2 more nails throughout the joist and to the end-of the header. Repeat on the opposite side of the header.

Attach on the opposite side of the opening in precisely the same manner. Place the 2nd headers flush against the first types if you’re installing doubleheaders and nail them in precisely the same way.

If you’re installing double-headers, the trimmer joists. This includes installing an added full-size joist on the exterior of each trimmer joist. The ends of the joists should rest on a loadbearing column or wall. Add two 16d nails equally spaced every one foot and the trimmer joists to join the newest joists.

Install tough opening aspect blocks. The opening might be too-large in another direction, although the headers previously type two sides of the tough opening body. If therefore, quantify the space involving the headers on each and every side of the dry wall opening and minimize on two planks to fit. Attach by adding two 16 nails equally spaced a-T 4 5-diploma angles through the ends of the blocks to the headers. This can be named “toe-nailing.” Do that on equally ends for both facet blocks.

Fix the framing. All these are light-weight lshaped steel mounts that match in the corners where joists and the headers fulfill. The connectors have predrilled holes that need nails unique to the kind of connector you get. Add the nails to the holes having a hammer that is routine.

See related

The best way to Do Building on a Concrete Flooring to an End Wall

The flooring is going to be on top of a structure base when a flooring is set to to guide the development of exterior walls. Several feet to to aid the creating will be recessed to the earth by this base. A part of the base layout comprises the setup of j- bolts or bolts. All these are pressed to the outer base part of the building at 3 to 6 feet and one foot from any endpoint . The j-piece of the bolt hooks the bolt to the mortar to to keep it. The best 2″ of the bolt protrudes in the concrete. This bolt can be used to to install the wood sill. Wall building is connected to the sill utilizing traditional wood building techniques.

Assess the amount of your base wall in the corners. Cut on a 2-by-6- to ensure both ends are square inch handled plank to the span.

Transfer up the sill plank against the shafts of the bolts and mark both sides of every bolt. Draw a line on the other side of the breadth of the plank at every mark by means of a carpenter’s square.

Measure to the bolt in the outside the masonry wall. Transfer the measure to the sill. The sill inch guidelines. your drill bit and Evaluation fit the sill on the concrete. Make any alterations needed for bolts that are slanted. Take away the sill.

Cut sill sealer insulating material to the proper length and make holes on the bolts using a utility knife to to match the sealer. In a few places it’s important to set up a shield on the sealer. Cut and match the defend using a drill as well as tin snips. The shield matches using the angle sides

Set the sill on the termite and sealer protect, compressing the sealer to to suit any irregularities of the concrete. Slide a 1/2-inch washer and nut onto the bolt and tighten using a wrench.

See related

Just How Do I Fill Out a Quitclaim Deed Type?

A quitclaim permits the grantor, an individual, to bestow interest in a a house the grantee, to someone else. This usually transfers possession of the house when there are not any other statements on the house. To be lawful, however, a quitclaim type filed together with the county recorder’s workplace and should be completed correctly. Filling out a cease claim form is a procedure that is simple. It needs just several basic measures.

See the form completely to ensure you aren’t consenting to anything which you don’t wish to be a part of the quitclaim.

On the line that states, “Filed for Report in the Petition of, your title is filled in by ”.

” complete your name as well as address, where it states When Recorded Reunite to “.

Fill in the price where the property has been transferred. If it’s a present, write-in “one dollar and love and fondness.”

Fill in the name of the grantee or grantees.

Fill in the county where the home can be found on the right line (where it states “county”).

Write in the entire description of the tax as well as the house parcel number. The legal description can be obtained by you from the first title, from the county recorder or from your mortgage records.

Sign and report the day on the title in the existence of a notary community.

See related