The best way to Use Lifeless Leaves as Ground Cover

Instead of sending them off to the closest dump where the leaves rot and in the course of time decay and bagging up your leaves, use them in your backyard as groundcover. Turning leaves right into a mulch retains your garden healthy and is green. Leaves help protect the floor from quick temperature changes and buffer the soil.

Leaf Shredder

Gather the leaves from around your entire trees. Leave them out to dry on an outdoor patio in the event the leaves are saturated with water. Wet leaves will not shred properly.

Turn the leaf-shredder on and fall the leaves to the shredder or mulcher. Place a bag beneath the the shredder to catch the leaves that are shredded as they exit the shredder.

Cover the floor using the mulch that is recently developed. Avoid within the the stems of crops as well as the trunks of trees. A 2- to 3 inch layer of mulch aids stomp out weeds and gives essential nutrients for your soil.

Lawn Mower

So they can be evenly dispersed across your whole garden the leaves. There really should not be be any piles of leaves.

Run your lawn-mower on the leaves to shred the leaves. Be sure to use all of the leaves to be collected by the collector attachment that is clipping.

Spread the leaves in your lawn over places that were un-covered. As the leaves decompose, they offer safety for groundcover and your garden.

See related

The best way to Move a Reclining Chair Upstairs

A chair positioned in a upstairs area gives visitors a useful resting place, but damage can be caused by shifting this cumbersome piece of furniture. The folding motion and fat of this chair make managing it particularly difficult. The trick to moving a recliner effectively doesn’t lie in power, but in organizing. Before starting an up-stairs transfer, calculate the doorways and hallways involving the potential and present areas. Sometimes, shifting an over-stuffed chair up a a hallway that is a good isn’t feasible. These types of moves need specialist movers experienced in accessing routes like attics or windows.

Measure the width of doorways, the chair and staircases. The width of the reclining chair requirements to be smaller in relation to the width of both staircase and the doorway. Move an hurdles from the shifting route like floor lamps or tables.

By by eliminating the again from the lower part disassemble the recliner. Locate the two lock levers in the rear of the chair. You generally find these steel locks situated at the back and lower-left part. Lift the locks using a flathead screw-driver. The best part is released by this. Lift the back from the lower part. Move the items up-stairs. Reassemble the chair parts and lock them in place. Not all recliners dis-assemble. Read the item guide to get specs in your chair.

Lock the chair in the up right position. Wrap the bottom of the chair with heavy duty plastic seal and wrap it. From coming out out through the move, this stops the bottom.

Slide a hand-truck underneath the rear of the chair. Tilt back the recliner as a buddy lifts the front of the chair. Wheel the chair backwards to the edge of the stairs. Lift the chair while your helper pushes in the front, utilizing the hand-truck. Pick out the shift gradually, one step at a time.

Guide the chair to the up-stairs place. Slide out the hand-truck from underneath the chair and unwrap the plastic.

See related

The best way to Paint a Room With Beadboard

Beadboard is a stylish wallcovering that provides elegance and classical heat to your room. Grooves and the wood panels produce interest in a space that is living. When you paint beadboard, whether it adorns the part of a wall as wainscoting or addresses an entire wall, you must be sure the surface is well-prepared. Beadboard that is painted is a unique characteristic in just about any home.

Mask off areas which you do not want to paint or program to paint a colour that is different than the beadboard. Where dry wall satisfies the beadboard painter ‘s tape seams. Place dropcloths or plastic sheeting on the ground to protect it.

Sand the beadboard with 220-grit sandpaper, utilizing a hand sander that is dry. The sand-paper eliminates topcoat finishes and smooths defects, creating the beadboard ideal to get a clean coat of paint. Wipe sandust the beadboard using a tack cloth off.

Prime the beadboard with oil-based primer, using a paintbrush. According to The Old House on the web, use primer to the area, edge and end-of each bit of beadboard to safeguard it from dampness, shrinking and swelling. Allow the primer to dry.

Pour dip a roller-brush in the paint and paint in a paint tray. A Concord Carpenter suggests utilizing a 3/8 inch roller nap. Roll paint on the portion of the beadboard toward the boards. Roll horizontally vertically in the event the beadboard is installed and in the event the beadboard is installed horizontally. Rolling paint in the grooves just as much as possible.

Dip a slanted-edge paint-brush, typically employed for painting straight and trim lines, in the paint. Paint the grooves involving the planks in the same path as the beadboard. Apply paint with easy strokes to prevent drips and clumps.

See related

Sea Kelp for Plants

The real key to your healthy backyard is healthy soil. When their roots have been in soil that’s rich in the nutrients plants prosper. Although chemical fertilizers might help solve deficiencies that are quick in the nutrient content of soil, natural fertilizers market the total wellness of the soil health insurance and insure the long term wellness of garden crops. Sea kelp is a normal material it is possible to use to problem soil — it can include over 70 70 vitamins, enzymes and minerals important to the health of a plant.

How Sea-Kelp Aids

The backyard of the ocean abounds with crops crops that are abundant in the the weather land require to flourish, including proteins, minerals, growth vitamins, hormones and enzymes. The growth hormones including cytokinin, in kelp, help the plant in the improvement of chloroplasts and processes like cell division and enlargement. Plants treated with sea-kelp tend to develop stronger root systems, resulting in foliage that is richer and plentiful create. Sea kelp promote soil microorganisms, which increases soil fertility through aeration and development. Furthermore, crops treated with sea-kelp create a resistance as the extra vitamins and minerals support their immune systems that kelp plays a role in the soil.

Obtaining Sea-Kelp

In the event that you reside close to the ocean, seaweed may be obtained. Harvest it by the bucketful yourself and use it to your own garden. It is possible to also buy sea weed as a fluid kelp extract or as dried kelp meal.

Applying Sea-Kelp

It’s possible for you to apply sea-kelp that is clean right in a 2- to 4 inch layer. Before implementing wash the salt in the kelp, as some crops may be sensitive to saltwater. As an option, merely a DD the kelp to your own compost pile that is regular. It is possible to also use a fluid kelp fertilizer that is commercial to the foot of the plant or contain it in a drip irrigation method.

Creating a Fluid Kelp Fertilizer

Clean sea kelp can be transformed by you in to a natural fluid fertilizer for effortless program. Simply a-DD two handfuls of sea-kelp to some 5-gallon bucket total of water. Sti R the water and kelp combination THREE TIMES instances per day. At the conclusion of the three times, s train the formula and dilute the fluid utilizing 2 elements water to TO AT LEAST ONE part kelp formulation. Transfer the formula that is diluted to mister or a spray bottle. Use the fertilizer throughout the morning or early evening by spraying the leaves from under and over before the fluid varieties droplets and drips off.

See related

The best way to Install Interlocking Edging

Interlocking edging locks for simplicity of installation. This pre-formed edging helps helps maintain one region of crops away from an region, for example between a border and garden crops. Of edging many items come in 6 inch sections, so that they work properly in a straight-line at the same time as around curves. With respect to the dimensions of the lawn, this task could be completed in a weekend.

Lay the hose on the floor. You may make sure that the edging will finish up where you want it, as opposed to installing edging to transfer it by performing so.

Measure the the length for edging. There are two methods to do this. One is to straighten measure and the hose in a straight-line. While it’s in location, the other is to to perform the amount of the tape measure over the hose. The 2nd is simplest to do should you not have several curves. The first is better in the event you do have a pattern that is more intricate. Be certain to place the hose back in position after measuring.

Purchase the edging, utilizing the measurements as a guide line. Buy additional when there’s a concern about not having edging and return the unused part after installation. Assemble the parts of inter-locking edging. Usually, there’s one finish that slides to the groove of an adjoining part. You can preassemble 1-foot sections to make issues go-faster throughout installation.

Of edging to the ground using the rubber mallet tap one section. Begin a-T either finish of the plant location being edged. Install the area by li ning up groove and the tab, then use the mallet to faucet it in the bottom. Repeat these steps before the region is totally edged.

See related

Pests of the Wax Myrtle Plant

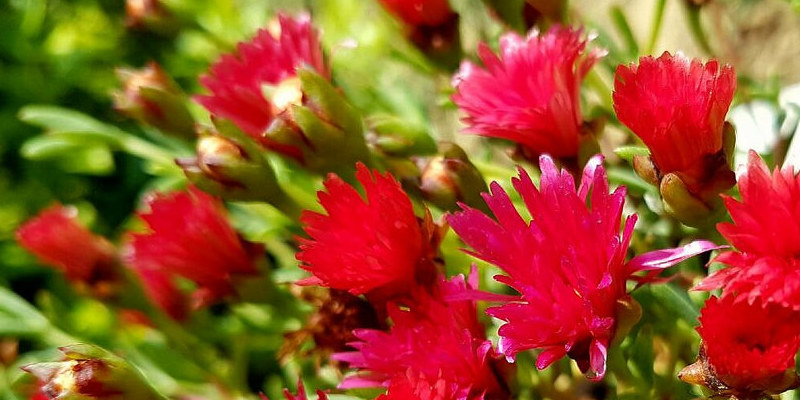
A fast growing evergreen plant, the wax myrtle (Myrica californica) can be a flexible addition to your own landscape in Sunset’s Climate Zones 14 through 24. Reaching heights of 10 to 30-feet, dense foliage which makes it perfect for use as a privacy hedge formed hedge, specimen plant, or windscreen is offered by the plant. While the wax myrtle is a plant that is hardy, adaptable, pests might become a problem when developing it. These bugs may be hard to expel, therefore it is essential to recognize and take them off as as soon as possible as feasible though there are several that impact the plant.

Whiteflies

Whiteflies are probably one of the most of the most pests that are frequent to impact wax myrtle crops. They can be extremely tiny, yellowish insects that suck sap from your plants’ foliage. They can be usually present in clusters on the under side of leaves and excrete honeydew which will cause the foliage. Some leaves produce a black mould that may lead to death. Whiteflies get their title in the wax that addresses human anatomy and the wings of adult bugs, although some some species also function coloured markings on their wings. Infestations of the pests tend to develop rapidly in summer, all year however they really breed. Getting cleared of white flies is very challenging once an infestation occurs. The most useful means of control is to instantly eliminate any plants that show indications of exercise that is whitefly. Aluminum foil near crops can assist repel the bugs, and traps might assist decrease populations that are current.

Thrips

Like white flies, thrips are by feeding on plant tissue pests that aff-ect the wax myrtle. They’re tiny, yellow insects that function long, slender bodies and wispy wings, and use a sucking mouth to remove fluids from the plant’s foliage. Thrip injury typically provides the leaves of a wax myrtle using a tough appearance. A big infestation of thirps can trigger mo-Re significant issues, including silver discoloration or a look on the foliage. They are able to also aff-ect the flowers of the wax myrtle, creating the petals to to show brown. Infestations reply including oils and neem. It is possible to also assist avoid thrip infestations in your wax myrtle plants by putting reflective supplies across the plants and managing weed progress.

Spider Mites

Spider mites are probably one of the most of the most frequent sorts of pests perhaps not among wax myrtle crops but all backyard crops. Unlike thrips and white-flies, they rather fit in with the arachnid course and are not bugs. They have been extremely little, therefore they’ve been often hard to to identify using the naked-eye. Spider mites generally come in in-groups on underneath of the wax myrtle’s leaves, where they suck cell substance in the plants. It is possible to usually tell your plant is affected by the existence of slim, silky webs with these pests which they produce around afflicted leaves though spider mites aren’t effortlessly observed. Evidence of harm includes yellow or red discolorations on the leaves and tiny dots. Spider mites breed swiftly in the sunshine, s O populations are generally most heavy in June. You will find lots of natural enemies of the pests, nevertheless, including girl beetles thrips, and predatory mites, s O infestations are generally kept under control.

Soft Scales

As they’re not effortless to to acknowledge as bugs scales might be one of the pests of the wax myrtle. Adult feminine and don’t shift, immature scales are wing less, and have a look s O person areas of the body aren’t distinguishable. They’ve an incredibly short lifespan, although adult males are small insects with wings. Both feminine and male scales have a straw-like mouth that they’ll insert to suck its fluids out. Evidence in their damage contains discolorations and curling . Scales excrete honey dew, which entice ants and can spur mildew progress. Natural enemies including parasitic wasps and beetles, mites, lacewings typically restrict soft-scale populations.

See related

The best way to Unclog a Toilet With Dishwashing Liquid

A clog in your bathroom does not have have to slow or price cash to you. Before contacting a plumber and canceling your vacation to the seaside, take to budging the clog with a few dish soap. The cleansing agents that make up the soap will help offer some lubrication also as split up the obstruction. Your bathroom is going to be working correctly and it is possible to go on together with your plans.

Heat 1 gallon of water in a stock pot over medium heat. When pouring the water, choose a pot handles for better control.

Pour 1/2 half-cup of liquid dish soap into the bathroom. Let the soap sit for 10 minutes.

Remove the pot from the stove before it starts to to make boil and bubbles.

In the event the soap has not previously eliminated the clog pour the warm water to the bowl rapidly. Hold the pot handles to prevent splashing yourself with all the water that is hot.

Seal a plunger on the drain hole of the toilet’s. Push down in the event the clog wants another nudge and pull on the handle. Repeat the un-clogging method with warm water and soap, if required.

See related

The best way to Winterize a Sunroom

Unless you are shivering — lounging in your sun room is a a terrific way to method to relax and unwind. In order to enjoy the the area year-round take action to make sure your sun room is comfortable on chilly winter days. Winterizing your sun room is a matter of maintaining the cool air from seeping in-doors, while offering a heat supply to cozy up the area. The cold temperatures, do not allow lock you out of your sun-room; before it arrives, get ready for for cooler climate.

Replace windows with insulating double- or triple-pane glass windows to keep the chill outside of winter. Seals and windows are usually the culprits adding to to temperatures as part of your sunroom.

Fill any gaps between the window-frame as well as the wall which will let cold-air seep inside. Use a latex that is paintable -silicone caulk that is created to last for several years. Caulk can adhere to your own clothes in the event that you brush against it and never dries.

Hang thermal-insulated draperies over your sun room windows to offer an extra barrier between your room as well as the windows.

Install electrical baseboard heating in place or your sun room a few space heaters across the area to offer a supply of heat. It is possible to also include a transportable electric fireplace using a builtin heatilator to the area for coziness that is extra, or a ceiling fan to keep-warm air circulating through the room.

Lay a large-area rug over cool wood or tile floors to protect your toes.

Toss plush or a blanket throw over the trunk of your sun-room settee or chairs to snuggle in on awesome times.

See related

The best way to Keep Warmth Within With Outdated Windows

Windows that are drafty can make your home feel unpleasant and chilly. Their power inefficiency can lead to heating bills that will have a huge bite from the budget. Do not despair; there are steps you can take to keep heat inside your house without changing your windows. Sealing window leaks and layering boundaries between windows that are aged as well as the interior of your home’s can cause you to feel more cozy within while leaving more cash in your wallet.

Run your hand over the inside perimeter of your windows to test for cold-air seeping inside. Seal cracks or any obvious holes with beads of silicone caulk. Use silicone caulk as it is versatile, water-resistant, offers a long lasting seal and will not shrink or crack.

Attach weather-stripping throughout the the inside perimeter of your windows to help make your house air tight. Measure each side of your window to find out the quantity of weather-stripping you will require. It’s possible for you to use adhesive- tape weather-stripping or backed foam that arrives in various widths you can cut to to match your window measurements.

Install detachable window inserts over your windows that are inside. A window insert is a light-weight poly vinyl movie that is occur a custom-produced frame to to match over your windows that are outdated. Press the inserts in to location for the cold temperatures and effortlessly pop out them throughout the summer. They are more powerful than than warmth shrink movie.

Hang thermal- draperies over your aged windows to supply an insulating barrier involving your residence inside areas as well as the window. Use Velcro to to add the drapes. Hang curtains above the most notable of the window and enable the edge to to the touch the ground or the window-sill to totally protect the window.

Window shutters on the exterior of your home. Solid-panel wood shutters might be closed to provide yet another barrier to help keep warmth within your home. It is possible to also pick from several ornamental designs to coincide with the exterior style of your home’s.

See related