Mold Cleanup in Your Home

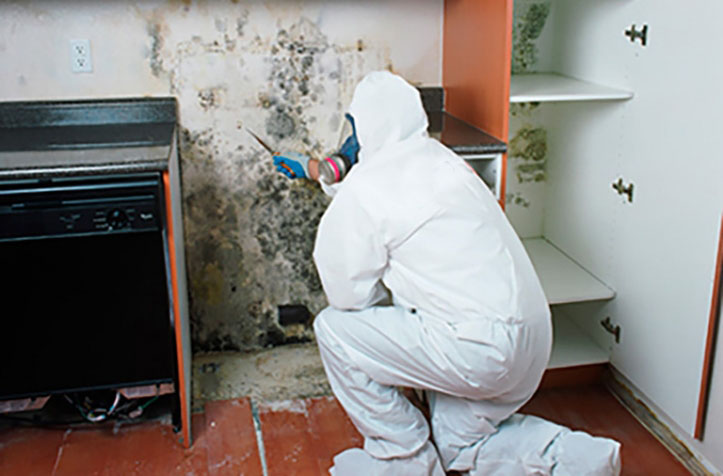
Mold is a dangerous substance to your home’s surfaces because it can quickly destroy whatever it propagates in, and the longer you leave it to grow, the more destructive it becomes. That’s why it’s important to quickly remove janitorial services Little Rock AR as soon as you see it growing.

Here are a few tips on how you can deal with mold when you come across it in your home:

Who Should Clean the Mold?

The answer to this question depends on a couple of dynamics, the first one being the amount of mold there is. Mold which has spread to an area that is less than 10 sq ft is easier to handle, and you can probably do it yourself easily. However, once you throw in water damage and mold growth of over 10 sq ft, then you should check out the Mold Remediation in Schools and Commercial Buildings, which as the name implies, is an EPA guide on how to eliminate mold in schools and commercial buildings.

Should you opt for a professional contractor to clean up the mold for you, it’s important to ensure that they have the appropriate experience needed to do the job properly. One way to do this is to check for their references and specifically request them to follow the EPA guide mentioned above for guidelines when doing the cleanup. It’s also a good idea to ask that they follow the guidelines provided in the American Conference of Governmental Industrial Hygienists (ACGIH), and any other guidelines that you may deem important and helpful from governmental and/or professional establishments.

These guides have helpful tips that directly address particular areas of the home. For example, the EPA guide mentioned above has guidelines that help in cleaning up mold in the heating/ ventilation/ air conditioning (HVAC) system, and as you’ll see in the guide, it’s essential that you switch the HVAC system off the moment you notice the possibility of house cleaning Little Rock contamination so that you can safely clean it.

Mold can also be caused by the presence of contaminated water or sewage water, in which case you’d have to hire someone who’s specifically skilled in repairing water damaged property, and if the mold is giving your health concerns, then you should consult with a health expert.

Tips and Tricks

While these tips can help you solve your cleaning services Little Rock AR issue, they may not be the same methods used by professional cleaners, and the affected area may never return to its original state and appearance even after the mold has been removed. Nevertheless, they are very helpful tips to help you to clean mold:

– Repair plumbing leaks immediately and don’t wait for other water problems to progress before fixing them either.
– If carpet or ceiling tiles start to grow mold, then it’s best to throw them away because it’s practically impossible to completely remove mold from porous materials like these.
– When dealing with mold on hard surfaces, be sure to scrub it off with a solution of water and detergent.
– Never apply paint on top of moldy surfaces. You should remove the mold first before you apply the paint, as leaving it will cause the paint to peel prematurely.
– Mold loves to grow in areas that are frequently damp, so it’s important to increase the ventilation in your bathroom and clean it regularly to avoid the creation of mold.

The best way to Stop a Do-Or From Closing

You you anticipate it to remain like that when you drive your door open. It is probably that the door is plumb if it gradually swings closed, partly or most of the way. The settling of the home as well as changes in climate can trigger your door to for one to see, to to hold somewhat crooked, while not perhaps not enough. Try some fixes that are simple to get your do or to to hold straight and quit closing.

Hinge Pin

Place little screwdriver or a big nail on the underside of the middle hinge pin of your door. Tap it using a hammer, forcing the nail. Close the door in case your door has only two hinges and hammer a little wood shim close to the best involving the frame as well as the door, on the door-knob aspect of the door. Tap out the pin of the hinge that is most effective.

Lay the pin across two wood blocks. The ends should rest under the the pin on the blocks with the region that is open. Hold one end of the pin constant with pliers.

Hit the middle of the pin using a hammer. One faucet needs to be enough to bend the middle of the pin.

Place the pin on top of the door hinge and hammer it back back to place. The new form of the pin should offer enough friction to keep the door.

Shim a Hinge

Lay an even over the outer fringe of of the door to find out whether bottom or the leading of the do-or is leaning out.

Ask a buddy wedge an e-book underneath the underside of the door in the edge, or to help you steady the do or.

Remove the screws in the event that you decided in the event the do or tilts inward in the underside, the door tilted inward in the top or in the hinge, where the wall is met by the hinge from your most notable hinge. Do not eliminate the hinge from the do-or the wall.

Trace the form of the hinge on an item of poster board or slim card-board. Cut out the form with scissors to generate a custom shim.

Place the shim on the wall wherever your hinge rests screw your hinge in to location within the shim. Test to produce sure that it’s level to remain open and maybe not near on its own or your do or is now le Vel. Repeat the procedure to a DD another shim when it’s not.

See related

How To Install Window Film

Installing window cleaning is an excellent way to improve the privacy that you get in your home. It does not cost much, but it may prove to be a bit tricky if you have no idea on what you are doing.

Continue reading as we’ll show you the tricks on how you can install your own window film for the best results.

The tools that you need are the following:

-Ruler
-Small plastic scraper
-Spray bottle
-Tape measure
-Squeegee
-Trimming knife

As for the materials, you will need the following:

-Baby shampoo
-Lint free towel or cloth
-Fresh water
-Masking tape
-Window film
-Window cleaner

Step 1: Clean your window.

To start off, clean the window that you plan on doing window repair. Do it thoroughly by using a window cleaner, preferably a solution that’s ammonia-based. Then, wipe it dry with the use of your squeegee. Double check to make sure that every drop of the window cleaner has been wiped off. If there are drops left, the adhesive on your window film will dissolve.

Step 2: Spray the glass with a mixture of baby shampoo and water.

Get your spray bottle and fill it with a few drops of shampoo and a glass of water. Shake the spray bottle and then spray your mixture into the window. The mixture will help your window film stick to the glass. Expect to be able to move or slide the tint around, which is perfect when you try to fit the film into the corners properly. You have to do this before the mixture dries completely.

Step 3: Measure, then trim the window film.

Measure your window, so you can find out how large the area that needs to be covered is. Allow at least 1 cm overlap on all sides. The next thing you need to do is roll the film on a horizontal surface. Make sure it is flat so you can trim according to your measurements. Start peeling the film’s backing off before you stick the tint on the window. You can use a piece of masking tape to help you with the peeling.

Step 4: Place the window tint onto the window.

Once you have peeled off the backing for about 5 to 10 cm, move the film to the surface where you will stick it. You can start by positioning the two top corners in place. As soon as you have the film placed in the ideal position, proceed on taking the rest of your film’s backing off.

Step 5: Remove your window film’s backing.

When you remove the backing off, do it in stages. Get your squeegee and use it to flatten the film into the window. Start at the center of your window and then push to the edges. In order for you to keep the glass moist, spray it with shampoo and water mixture. This will ensure that the finish is much smoother.

Snake Crops With Yellow Leaves Which Might Be Curling

One of the most care-free crops it is possible to own, snake plant (Sanseveria trifasciata), also also known as mom-in-law’s tongue, adapts effortlessly to house surroundings. The crops develop to 2-feet tall with long, upright, sword shaped leaves that originate in the root of the plant. Every couple of years plants might create clusters of flowers. Although they tolerate most types of neglect, one thing-they can’t withstand is over-watering, that causes causes rotting roots and yellow, curling foliage.

Watering a Snake Plant

Snake crops don’t require much water. In summer and spring, water frequently enough to keep the soil moist. In fall and winter, enable the soil to become nearly dry. It’s difficult to tell how moist the soil is close to the middle of the pot where the roots are. One way to check the soil would be to insert your finger to the next knuckle. The plant needs water in case it feels dry only at that depth. Snake plant leaves grow in a pattern that forms a cup shaped heart. Never pour water to the middle of the plant. Discard.

Potting Soil

Even the greatest planting medium doesn’t last for ever. Organic components breakdown as well as the soil deteriorates. Worn-out planting medium can’t control water-well, leading to soggy soil that doesn’t drain. Repot snake crops every 2-3 years to re-fresh the soil, if the plant seems to require re-potting. It is possible to repot it in to the pot, in the event the pot size is sufficient. Remove as much of the soil as possible, replacing it by fresh soil. Adding a layer of pebbles to the underside of the pot might help avoid over-watering as time goes on.

Saving the Plant

Remove the plant in the pot and brush as much of the s Oil as feasible away. Rotting roots are darkish in-color and slimy-seeking. If more than onequarter of the roots present indications of rot, the plant possibly can’t be saved. Prune the broken portions of the roots off, and minimize the broken leaves near the foot of the plant out. Snake plant roots are challenging and thick, and you also might need to use a knife to cut-through them. Repot the plant utilizing refreshing planting medium.

After Treatment

After pruning the roots, don’t water the plant for three days. Mist the very top of the s Oil as well as the foliage three or two times a day. Water the s Oil distributing within the the top of pot. Following a week it is possible to begin watering the plant as typical.

See related

The best way to Trim Jade Bonsai

Beginning bonsai lovers have great results outcomes instruction simple-to-develop jade bonsai trees (Crassula ovata). Jades are native to mountainous areas of southern Africa, where they develop to eight feet tall. When training bonsai trees, the the thing is to constantly prune the branches of normal trees when the trees are very tiny starting. This branch-pruning, along with root- little containers that are developing, trains the trees to increase as versions of the plant that is actual. Bonsai are perfect for gardening everywhere. In Sunset’s Climate Zones 14, 15, 16 and 17 it is possible to grow jade bonsai trees outside provided that your coldest temperatures don’t drop below 45 degrees Fahrenheit.

Trim a little jade bonsai right into a tree shape by by eliminating leaves and branches that clutter the type you want. Study the plant and visualize the tree that is completed, then eliminate development that doesn’t follow type. Make the cuts flush along the principal branch or trunk when you snip tiny branches. Don’t abandon an ugly stub, and don’t make a concave cut that produces a hollow where rot can set in.

Define the stems by nipping off leaf buds and leaves over the stems, you want to become branches. Allow several leaves to develop in the ideas as foliage that is diminutive, and trim leaves over the branch off. Repetitive trimming aids create denser leaf buds over time to get a more treelike look. Snip the final bud of an over-sized branch to restrict pressure aspect branching and its duration.

Allow cuts to air callus and dry over normally. Pruning sealants aren’t required with jade — cuts that are sealed generate problems for rot diseases to produce.

Remove leaves and branches cautiously in the interior components of the bonsai with tweezers. Using tweezers instead of your fingers gives you manage and better visibility employed in in the areas that are tiny.

As required trim your bonsai weekly. Trimming helps helps maintain the foliage little.

See related

Shrubs that are arching

Shrubs come in various kinds and so are useful for reasons that are various. Shrubs with stately types could be used in the entrance of a route, as a a house divider or as a back-ground in a landscaping style. Shrubs, with reduced types, could be employed to guide the eye or produce a reduced history for flowers that were small-scale. Arching shrubs, nevertheless, are frequently used to attract the eye. These crops, also called fountain shrubs shrubs or shrubs that are cane, have extended branches that significantly drape above a landscape, producing visual interest.

Appearance

Arching shrubs don’t develop from a single stem or trunk. Instead, they have been formed by clusters of arching stems that protrude in the floor in the location that was generalized. Arching shrubs come in several varieties and therefore grow to heights that are various. Generally, these crops so are nearly as round as they’re large and are between 4 and 12-feet tall.

Standard Pruning

Avoid the temptation to prune these plants into a box development that is hedge-like. These shrubs are obviously fairly unruly. Their cane-formed stems drape and arch, standing in stark contrast with all the limited and rigid construction of shrubs. Pruning the ends of an shrub can lead to crops that are diseased and malformed. To prune your shrubs, by by eliminating stems, leaving healthy, thin the plants stems to develop freely.

Drastic Pruning

Completely stop over-large and harmful crops which have grown from control. Shear all branches to the floor. Do this in the spring to provide your shrub a possibility to begin clean using the starting of the developing time. Your shrub is going to be green and healthful when it grows straight back.

Landscaping Techniques

Use these shrubs as accent parts in landscapes that are minimalist to produce drama and visible curiosity. Shrubs with colourful blooms should be colour-matched to flowers in your lawn or landscape. These crops doubles as back-ground to get a lush yard.

Varieties

You’ll find lots of varieties of arching shrubs. White-blossomed smoothleaf snowberry (Symphoricarpos albus) is equally hardy and stunning. It’s going to thrive in Sun Set Environment Zones 1 to 1-1, 1 4 to 2-1 and 3 2 to 4 5. The popular forsythia (Forsythia viridissima) sports cheerful yellow blooms from late cold temperatures to planting season. This shrub thrives in Sun Set Environment Zones 3 to 1 1, 1-4 to 16, 18, 19 and 3-0 to 4 1. The lush and big shrub called beauty bush (Kolkwitzia amabilis) grows blooms which might be light pink, nearly white. In full-sun, this bush will be quick and mo Re dense, but this bush can turn into as tall as 12-feet. Beauty bush is indigenous to China but will develop in the Environment Zones of Sunset’s 2 to 1 1, 3-1 to 4 1 and 1-4 to 2-0.

See related